Introduction
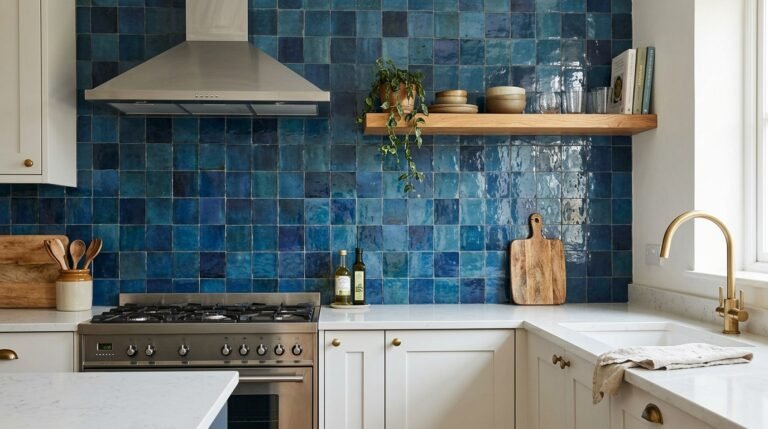
Picture the heart of your home glowing with warmth, texture, and style. That’s what the right island can do. If you’re searching for kitchen island ideas that actually work in real homes, you’re in the right place. Some islands add storage. Some add seating. Others simply make the room feel beautiful. In this guide, you’ll find 20 fresh, practical designs, from sleek waterfall stone to cozy banquette seating and smart pull-out drawers. I’ve noticed that most people feel stuck because they don’t know what’s possible, so I’ve included simple tips, sizes, and styling details to help you choose with confidence. Whether your kitchen is tiny or open-plan, there’s an idea here you can save, try, and love.
Waterfall Edge Island
- Turns a plain countertop into a sculptural focal point
- Hides side cabinet seams with one continuous stone surface
- Protects cabinet ends from kicks, scuffs, and splashes
- Works best with simple cabinets so the stone can shine
Ever walked into a kitchen and felt your eyes land on one spot immediately? That’s the magic of a waterfall edge. The countertop material spills down both sides of the island in one seamless sweep, creating a clean, gallery-like shape. It instantly feels modern, expensive, and calm. Because the stone wraps the ends, the island looks like a single sculpted block instead of a box with a top. In small and large kitchens, this simple detail adds drama without extra decor. Pair it with quiet cabinetry and soft neutral walls, and the island becomes the star of the room.
In my experience, a waterfall island works hardest in kitchens that need a visual anchor. Homeowners especially love how easy it is to wipe down, since there are no bumpy edges where crumbs hide. Choose a stone with soft veining, and the pattern flows around the corners like a quiet piece of art. Kids can lean on it, guests gather around it, and everything still looks polished. Just remember that matching the veining at the corners takes a skilled fabricator, so ask to see a layout sample before anything gets cut.

Two Tone Painted Island
- Adds instant color without repainting the whole kitchen
- Separates the island from surrounding cabinets so it stands out
- Brass or black hardware makes the contrast feel intentional
- Easy to repaint later if your style changes
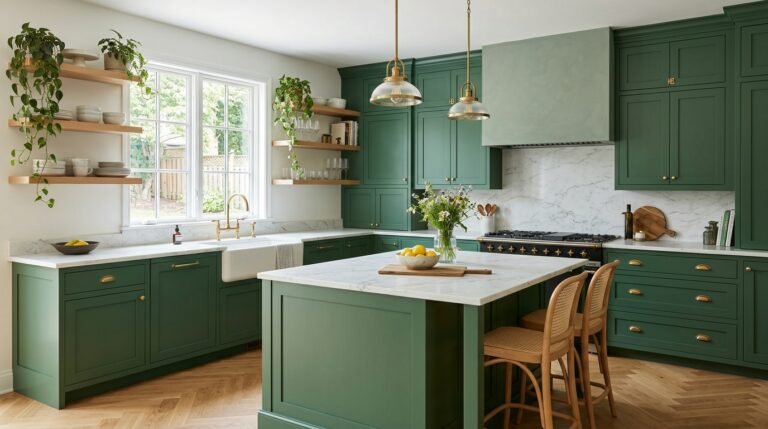
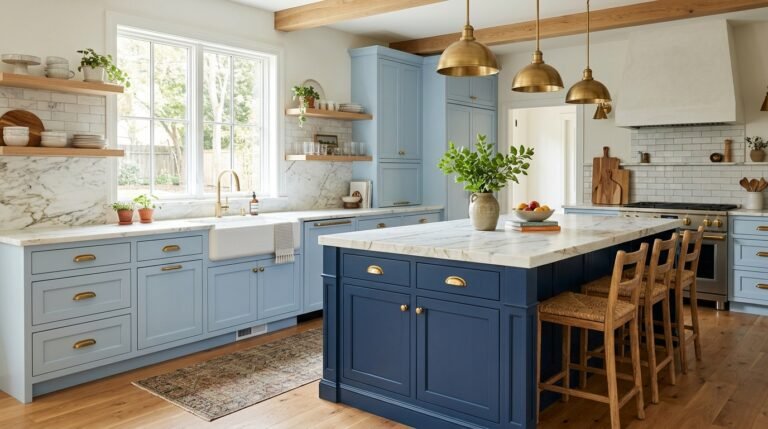
Want a fresh look without a full remodel? Paint the island. A bold shade like navy, forest green, or charcoal gives the room a clear center, while lighter cabinets around it keep things bright. The contrast creates depth, and depth is what makes photos of kitchens feel so layered and rich. Even a plain, builder-grade island can look custom after a coat of quality cabinet paint and new hardware. This is one of the most budget-friendly kitchen island ideas because the shape stays the same while the personality changes completely. Choose a satin finish so fingerprints wipe away easily.
I’ve seen this work well in many homes where the kitchen felt flat or too matchy. The key is choosing a color that echoes something else in the room, like a rug, a backsplash tile, or the view outside. Test paint samples on a large board and look at them morning and evening, because light changes everything. Keep the countertop light or natural so the dark base doesn’t feel heavy. Add warm metal pulls, and the whole island looks finished. Guests will notice it first, and you’ll enjoy walking past it every single day.
Built In Breakfast Bar
- Creates a casual spot for coffee, homework, and quick meals
- Frees up space by replacing a bulky dining table
- Keeps the cook connected to family and guests
- Needs about 10 to 12 inches of overhang for comfortable legroom
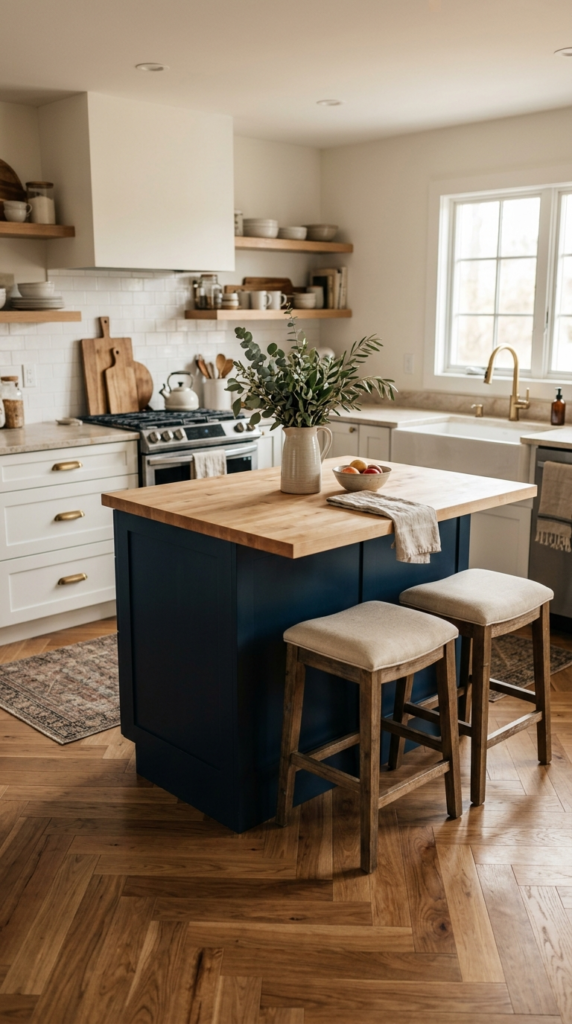
Some of the happiest moments happen at the kitchen counter. A built-in breakfast bar turns one side of your island into a cozy perch with stools tucked underneath. It saves floor space, adds seating, and keeps everyone close while dinner comes together. Picture morning coffee, laptops open, and kids chatting about their day. The overhang gives the island a layered, welcoming profile that looks great from every angle. In smaller homes, this feature can replace a dining table entirely, which opens up room to move. Choose stools with low backs and soft seats, and people will stay for hours.
That’s why many designers recommend planning the seating before choosing the island size. Allow about 24 inches of width per person and 10 to 12 inches of overhang for knees. Keep stool height in mind, too: counter stools suit 36-inch counters, while taller bar stools need a raised ledge. I’ve noticed that families use this spot far more than a formal dining room. Add a pendant light above to define the zone, and the corner feels like a small cafe. Make sure the overhang is supported with hidden brackets or corbels so the stone stays safe and sturdy.
please also read: 18 small kitchen ideas
Butcher Block Island
- Brings natural warmth to cool, hard-surfaced kitchens
- Gives you a real prep surface that is gentle on knives
- Ages beautifully, with a richer glow over time
- Can be sanded and refinished if it gets scratched
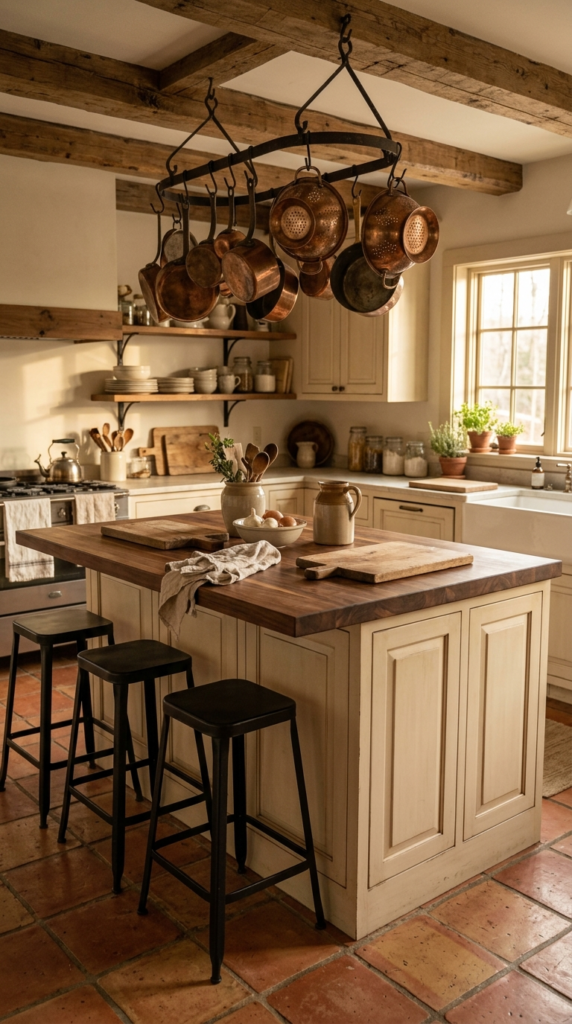
Nothing warms up a kitchen like real wood. A butcher block top brings texture, color, and a touch of nature to an island that might otherwise feel cold. The grain catches light beautifully, and every board looks a little different, which gives your kitchen a handmade character. It pairs well with white, sage, or navy cabinets, and it softens sleek stone or tile around it. Picture a thick walnut slab with a slow golden glow in the morning sun. It feels welcoming the moment you walk in, and it invites you to start chopping or kneading.
In my experience, wood needs a little care, but the routine is easy. Rub food-safe mineral oil into the surface once a month, and the top stays smooth and water-resistant. I’ve noticed that small knife marks fade into the grain and even add charm over time. If deep scratches appear, a light sanding brings the surface back to life. Keep it away from the dishwasher and avoid leaving standing water near the sink. Many homeowners choose wood only for the island and keep stone elsewhere, so they enjoy the beauty without worrying about heavy cooking zones.
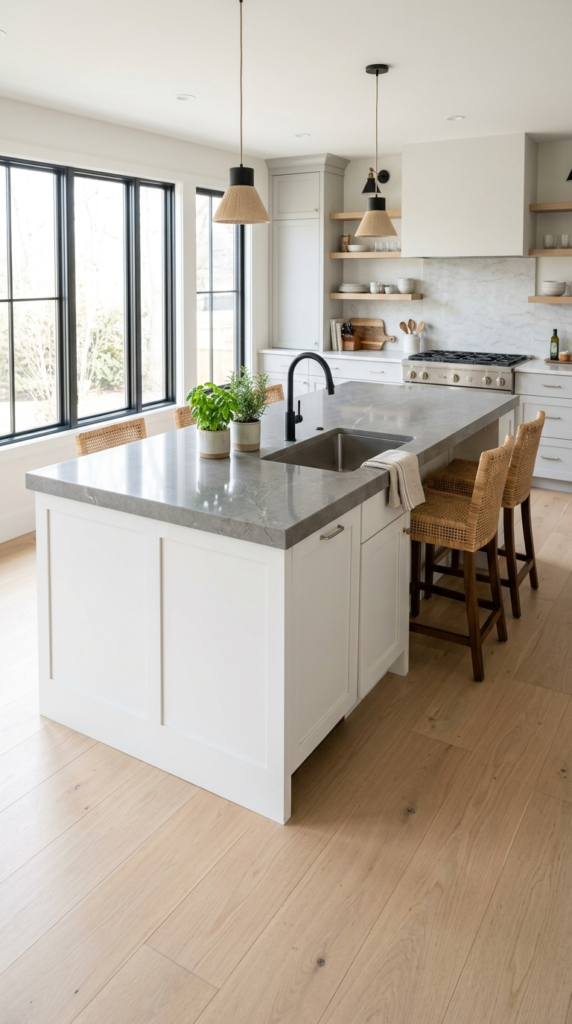
Island With Sink
- Lets you wash produce while facing family or guests
- Shortens the walk between prep, cooking, and cleanup
- Frees wall space for windows or open shelves
- Needs smart plumbing planning, so decide early in the remodel
Why stand with your back to the room while you wash vegetables? An island sink flips the script. You face the people you love, chat while you rinse, and keep an eye on little ones at the table. It also creates a natural prep zone right where you cook, which cuts down on steps. A sink in the middle gives the kitchen a hardworking, professional feel, especially with a tall faucet and a deep basin. It turns daily chores into something that feels a little more social and a lot more fun.
I’ve seen this work well in kitchens where the main wall is full of windows or cabinets. Moving the sink to the island frees that wall for a range or open shelving. Plan the plumbing early, because drain lines and vents run through the floor and can raise costs. Many designers recommend a deep, single-bowl sink and a splash-friendly faucet height. Add a small raised ledge or keep the seating on the opposite side so diners avoid dishes. A built-in trash pull-out beside the sink keeps cleanup tidy and hidden. Choose a durable counter that handles water well.
Open Shelf Storage
- Adds display space for baskets, cookbooks, and favorite dishes
- Breaks up heavy cabinet fronts so the island feels lighter
- Keeps everyday items within easy reach
- Works well on the end facing the dining area
Cabinet doors can make an island feel like a big closed box. Open shelves fix that in one move. Suddenly there is space for woven baskets, cookbooks, and pretty bowls you actually love using. The island feels lighter, friendlier, and more personal, almost like a piece of furniture you collected over the years. Even a single shelf at the end adds charm and breaks up long lines of cabinetry. Warm wood, painted finishes, and simple brackets all work beautifully. Picture soft light falling across stacked plates and a trailing plant. It gives the kitchen a relaxed, lived-in beauty.
In my experience, open shelving works best when you edit it. Keep daily dishes, a few cookbooks, and one or two plants, and leave a little breathing room between them. I’ve noticed that clutter shows quickly, so pair shelves with closed drawers on the opposite side for messy items. Use the shelf end that faces the dining area, not the cooking side, so grease and splatter stay away from your dishes. Baskets hide odds and ends neatly, while matching jars add calm. Wipe shelves weekly, and the look stays fresh and inviting.

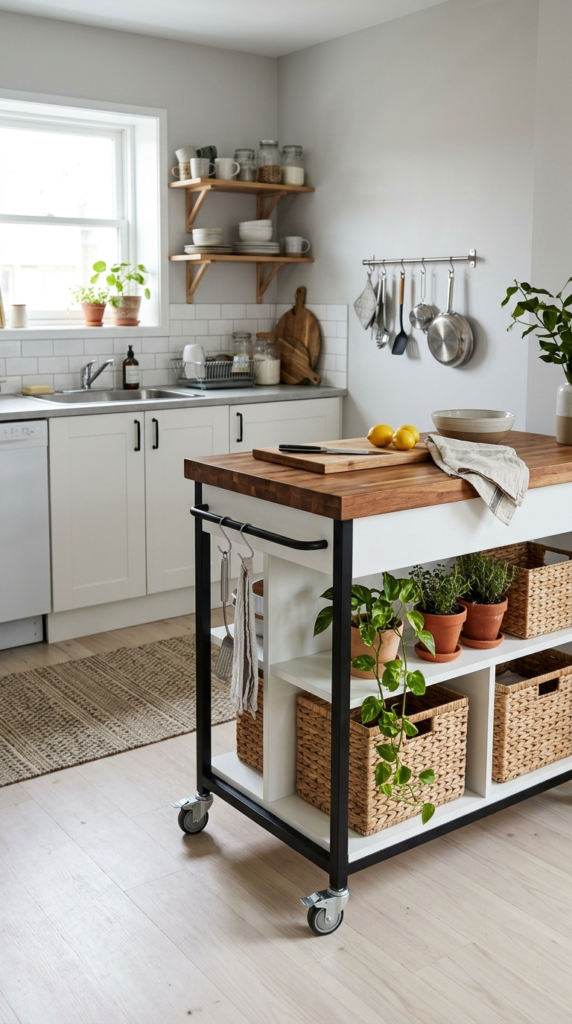
Mobile Island Cart
- Adds prep space only when you need it
- Rolls away to keep walkways clear
- Gives small kitchens and rentals an island look without building anything
- Lower shelves add storage for baskets, books, and plants
Small kitchen, big dreams? A rolling island cart might be the smartest upgrade you can make. It gives you extra counter space the moment you need it and rolls away when you don’t. Picture it parked beside the stove during dinner prep, then tucked against a wall afterward. Locking wheels keep it steady, while a lower shelf holds baskets, cookbooks, or a trailing plant. Because it is not fixed in place, the room never feels crowded. It is a gentle way to enjoy island style in apartments, rentals, and narrow kitchens where a permanent build simply will not fit.
I’ve noticed that the best carts are heavier than they look. A solid wood or steel frame stays stable when you knead dough or chop vegetables, while flimsy models wobble. Look for a top that is at least 36 inches high to match standard counters, and wheels with firm locks. Many renters love that the cart moves with them to the next home. Style it with a small bowl of fruit and a few hooks for towels, and it feels like real furniture. Leave about 36 inches of walkway around it so traffic flows comfortably.
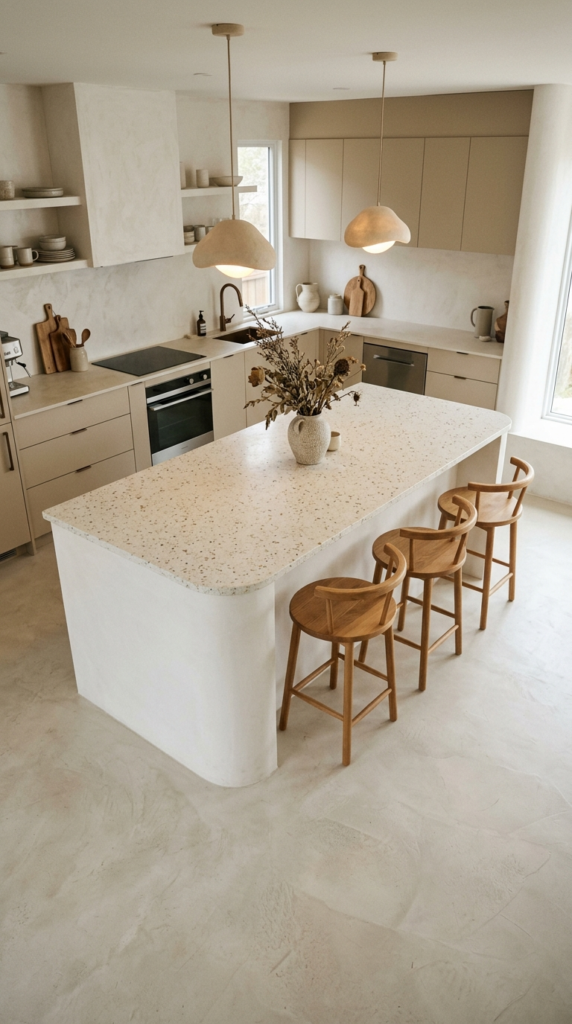
Curved Island Edges
- Softens sharp corners in busy walkways
- Adds a gentle, boutique-hotel feel to modern kitchens
- Helps traffic flow smoothly around the island
- Works especially well in open-plan spaces
Sharp corners have a way of finding hips and elbows. Rounded edges solve that gracefully. A curved island softens the strict lines of cabinets and appliances, giving the kitchen a calm, organic flow that feels almost like a boutique hotel. Whether you choose gently rounded corners or a full half-moon end, the shape guides your eyes around the room instead of stopping them at a hard edge. It also makes walking past easier, especially in tighter layouts. Pair it with warm neutrals, textured stone, or fluted panels, and the whole space feels relaxed, modern, and quietly luxurious.
Designers often suggest curves for homes with young children or busy walkways. Bumping into a rounded corner simply hurts less. I’ve seen this work well in open-plan spaces, where a curved end gently separates the kitchen from the living area. One thing to know: curved cabinetry and stone are custom work, so expect a higher price and longer lead time. A budget-friendly option is a standard island with rounded corners only. Choose a seamless countertop, such as quartz or terrazzo, and the curve looks smooth and intentional rather than pieced together.
Cooktop Island
- Turns cooking into a social moment instead of a solo task
- Puts the stove at the center of the room
- Frees the back wall for windows or open shelves
- Needs strong ventilation, so plan the hood early
Imagine stirring dinner while chatting with everyone in the room. A cooktop island makes that real. Instead of facing a wall, you cook at the center of the action, with family, friends, and homework all within reach. It gives the kitchen a bold, restaurant-style focus and opens the back wall for windows, shelves, or a statement backsplash. Induction cooktops are especially popular here because they stay cool around the edges and wipe clean in seconds. With a sleek hood above, the island becomes both a stage and a workhorse, ready for weeknight pasta or weekend feasts.
From what I’ve seen, ventilation is where this idea succeeds or fails. A ceiling-mounted hood or a downdraft system must be planned before the ceiling and floor are finished, so talk to your contractor early. I’ve noticed that cooks appreciate at least 15 inches of counter space on each side of the burners for hot pans and ingredients. Keep seating on the opposite side, away from splatter and heat. Add a deep drawer below for pots, and the setup feels effortless. A little planning here gives you a kitchen that looks stunning and cooks beautifully every day.

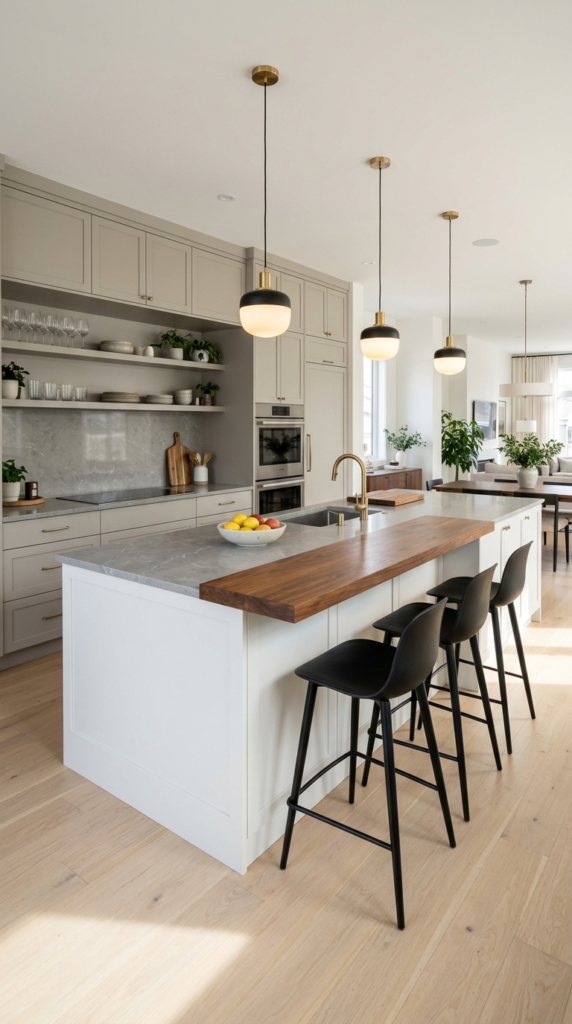
Two Tier Island
- Hides prep mess behind a raised ledge
- Separates the cooking area from casual seating
- Adds visual layers that make the island look custom
- Gives kids a splash-free spot to sit
Why settle for one flat surface when you can have two? A two-tier island stacks a lower work counter beside a raised bar ledge, and the difference is instantly noticeable. The upper level acts like a soft screen, hiding cutting boards, dirty bowls, and cooking clutter from guests. The lower level stays practical for chopping and rolling dough. Together they create a layered profile that feels architectural and thoughtful. Picture friends gathered at the high ledge with drinks while you work calmly below. It gives the kitchen a clear rhythm, and it makes even a simple island look designed.
In my experience, the raised ledge works best at about 42 inches high, paired with taller bar stools. The lower counter stays at the standard 36 inches, so cooking still feels natural. I’ve noticed that homeowners love how the ledge blocks splashes from reaching diners. Choose a contrasting material for the upper tier, such as warm wood against stone, to highlight the two levels. Keep the ledge about 12 inches deep so it does not eat too much prep space. Leave knee room on the seating side, and add a pendant above to finish the look.
Wine Rack Storage
- Turns an unused island end into a display feature
- Keeps bottles within reach for dinners and gatherings
- Adds a boutique, cafe-style detail
- Pairs well with cubbies for glasses
Hosting just got a little more stylish. A built-in wine rack tucks bottles into the end of your island, turning leftover cabinet space into something beautiful. Diamond cubbies, slim horizontal slots, or simple wooden dividers all create a graphic pattern that draws the eye. Guests notice it right away, and you grab a bottle without opening a single door. It feels like a small wine bar in the heart of your home. Even if you only keep a few favorites, the display adds warmth, rhythm, and a sense of welcome that plain cabinet doors never quite deliver.
I’ve seen this work well in homes where the island end faces the dining room. The rack becomes a quiet backdrop for gatherings. Store bottles on their sides, since that keeps corks moist, and place the rack away from the stove, because heat can spoil wine quickly. Many designers recommend adding a small shelf above the rack for stemware. If wine is not your thing, the same cubbies hold sparkling water, olive oil, or rolled towels. Keep each opening about 4 inches wide for standard bottles. Sand the edges smooth, and finish them with a clear sealer.

Statement Pendant Lights
- Adds instant personality without touching the cabinets
- Defines the island as its own zone
- Gives soft, warm light for evening meals
- Draws the eye upward so ceilings feel taller
Lighting is the jewelry of a kitchen. Hang a few oversized pendants above your island, and the whole room feels finished. Woven rattan, smoked glass, brushed brass, or matte black each set a different mood, yet all of them pull the eye upward and create a glowing focal point. At night, the soft pool of light makes the island feel like a cozy stage for dinner and conversation. Even a plain white island looks styled with the right fixtures overhead. It is one of the quickest upgrades that delivers a big visual payoff, often in a single afternoon.
In my experience, size and spacing decide everything. Hang the bottom of each pendant about 30 to 36 inches above the countertop, so it lights the surface without blocking views. Space fixtures roughly 24 to 30 inches apart, and choose an odd number, like one wide or three medium, for a balanced look. I’ve noticed that dimmers make a huge difference, letting you go bright for cooking and soft for dinner. Pick warm bulbs around 2700K, and food looks inviting. Always check that the fixture is rated for your ceiling height, and ask an electrician about the wiring.

Fluted Panel Base
- Adds texture and depth without extra decor
- Makes a plain island look like custom furniture
- Soft shadows change with the light all day
- Pairs well with smooth, simple countertops
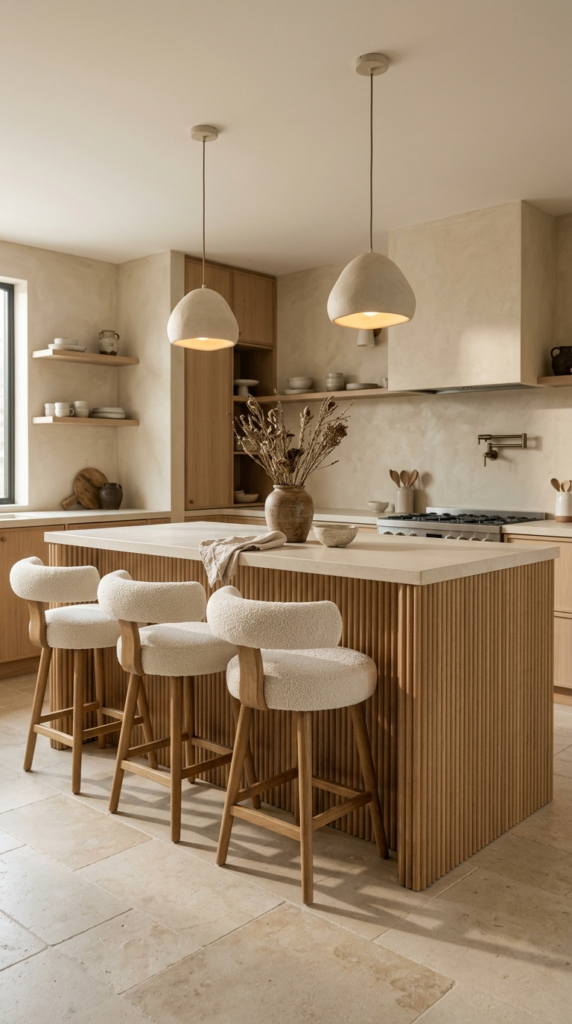
Flat cabinet doors can feel a little plain. Fluted panels change that fast. Narrow vertical grooves run along the front of the island, and light creates soft shadows that shift through the day. The result feels textured, tactile, and quietly luxurious, like a piece of custom furniture instead of a cabinet box. Wood, painted finishes, and even stone all look lovely in this style. It pairs well with smooth countertops, so the texture becomes the star without feeling busy. Picture warm oak ribbing under a creamy top, finished with stools. It adds depth to modern, Japandi, and traditional kitchens.
In my experience, fluted fronts hide everyday wear better than smooth ones, because tiny scuffs blend into the grooves. I’ve noticed they also add the look of expensive millwork without a huge budget. Many homeowners buy flexible fluted panels and glue them onto an existing island, which saves money and time. Choose grooves about one inch wide for a clean, modern rhythm. Wipe them with a soft brush or damp cloth, since dust can settle in the channels. Keep the rest of the kitchen simple, and let this one textured surface carry the design.
Built In Banquette Seat
- Replaces tall stools with a comfy cafe-style bench
- Seats more people in less floor space
- Lift-up lids add hidden storage underneath
- Soft cushions bring color and comfort
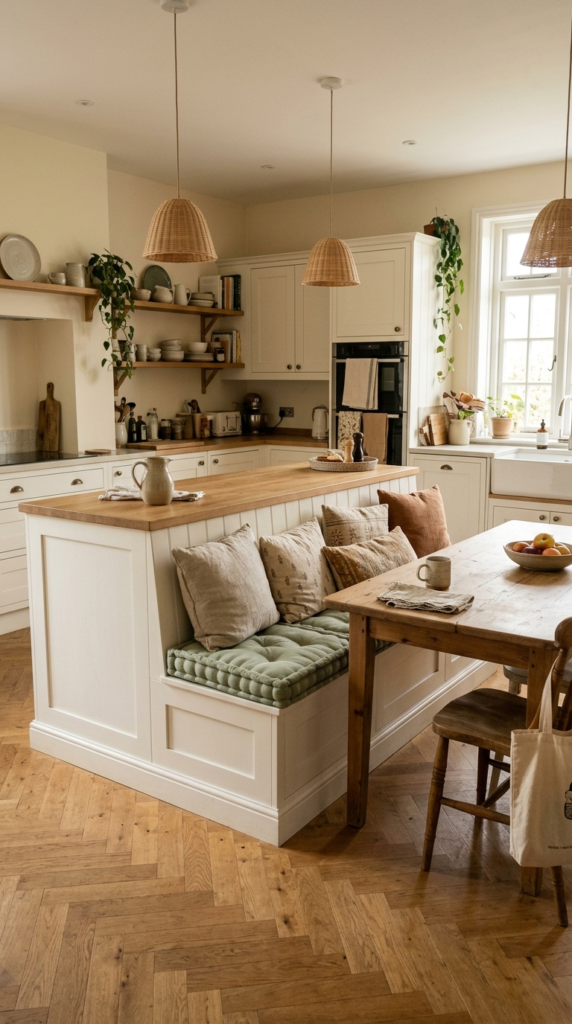
Who says island seating has to mean stools? A built-in banquette wraps a cushioned bench along one side of the island, and suddenly the kitchen feels like a cozy cafe booth. Kids can slide in, grown-ups can linger with coffee, and nobody has to balance on a tall seat. The bench also tucks against the island, which keeps walkways open and the footprint tidy. Soft cushions in linen, velvet, or leather add color and comfort. Picture a sage green seat under warm pendant light on a rainy morning. It turns a busy workspace into a place people want to stay.
I’ve seen this work well in homes where families eat most meals at the counter. A banquette seats more people in less space, since benches slide close together without needing elbow room. The base doubles as storage, so lift-up lids can hide seasonal platters, board games, or extra linens. Aim for a seat height of about 18 inches and a table-height ledge around 30 inches for comfort. Choose a wipeable performance fabric, because crumbs and spills are guaranteed. Add a few pillows and a washable throw, and the corner turns into the coziest spot in the house.
Concrete Island Top
- Gives a one-of-a-kind surface with soft, cloud-like tones
- Balances warm wood and greenery with a cool, calm base
- Can be poured in almost any shape or thickness
- Needs regular sealing to resist stains
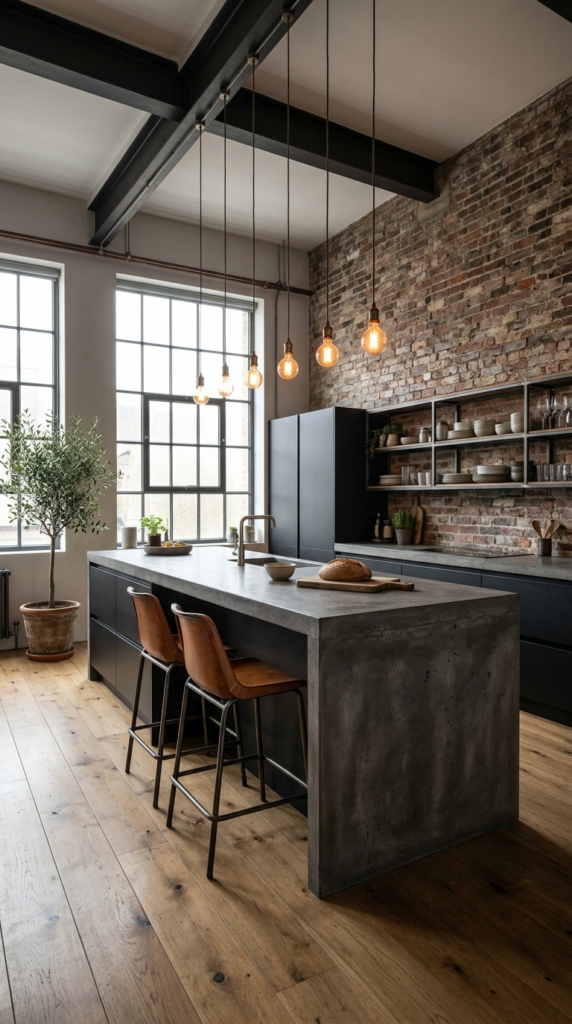
Raw, quiet, and surprisingly elegant, concrete brings a studio-like calm to any kitchen. The surface has soft cloud-like variations that no two homes share, so your island becomes one of a kind. It looks stunning in charcoal, warm gray, or even creamy white. Against wood stools and plants, the cool tone feels balanced and grounded. Because it can be poured in almost any shape, it suits long islands, curved ends, and thick chunky edges. Picture a smooth gray slab catching late afternoon light beside warm oak. It gives a modern or industrial kitchen real character without shouting for attention.
In my experience, concrete needs one thing: a good sealer. Without it, lemon juice and red wine can leave faint marks. With a quality sealer and a fresh coat of wax every year or so, the top stays smooth and stain resistant. I’ve noticed that tiny hairline cracks sometimes appear, and many owners see them as natural charm. Ask your installer about reinforced mixes if you want extra strength. Use trivets for very hot pans, and cutting boards for chopping. Expect the weight to be heavy, so the base cabinets must be sturdy and level before installation begins.
Hidden Power Outlets
- Keeps cords off the counter and out of sight
- Gives you a charging spot right where people sit
- Pop-up or side-mounted units blend into the design
- Saves you from running extension cords across the room
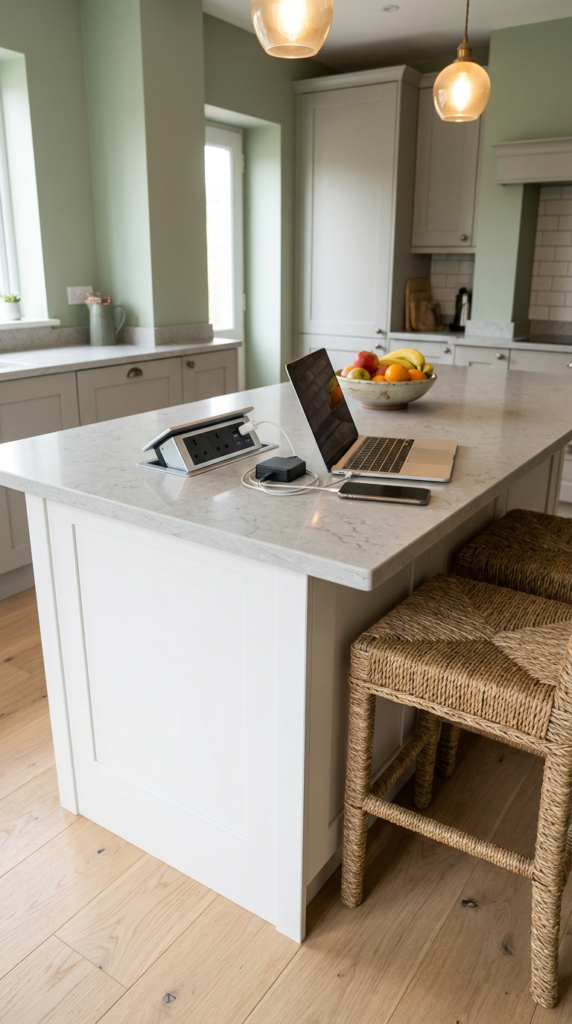
Ever hunted for an outlet while your phone dies on the counter? A hidden power outlet fixes that in a second. Pop-up and pull-out models sit flush with the island top, then rise only when you need them. They keep the surface clean, calm, and clutter free. Picture a laptop charging beside a cup of tea, with no cords stretched across the room. Codes often require an island outlet anyway, so this upgrade is practical and stylish. Choose a finish that matches your hardware, such as brushed steel or matte black, and the detail disappears into the design.
In my experience, outlet placement matters more than the outlet itself. I’ve noticed that people charge devices at the seating side, so place the unit near the stools, not beside the sink. Keep it at least a few inches from water, and ask an electrician about GFCI protection. Many designers recommend a model with USB ports built in, which saves bulky chargers. Pop-up units also hide well on a busy countertop, while side-mounted ones tuck under the overhang and stay out of sight entirely. Plan the wiring before the stone is cut, because adding it afterward means expensive changes.
Tiled Island Front
- Adds color, shine, and handmade character in one move
- Protects the island front from scuffs and splashes
- Works with bold patterns or soft, solid shades
- Turns a plain cabinet box into a true focal point
Tile can turn a plain island into pure charm. Glossy zellige, patterned cement tile, or classic subway squares wrap the front in color and texture that paint simply cannot match. Light bounces off each uneven surface, creating a soft shimmer that shifts through the day. It is one of the most playful kitchen island ideas for homeowners who love a handmade, collected look. Pair deep green or terracotta tile with a white top and brass pulls, and the island looks like it belongs in a sunny Mediterranean home. Even a small island gains personality with this single, simple upgrade.
I’ve seen this work well on islands that take a lot of daily wear. Tile shrugs off scuffs from shoes and stool legs, and a quick wipe handles splashes. Choose a grout color close to the tile, since it hides stains and looks cleaner. In my experience, small tiles around three inches wide follow curves nicely, while large tiles feel sleek and modern. Ask the installer to seal the grout once a year. Keep the countertop simple so the tile takes center stage, and run the pattern all the way to the floor for a polished finish.
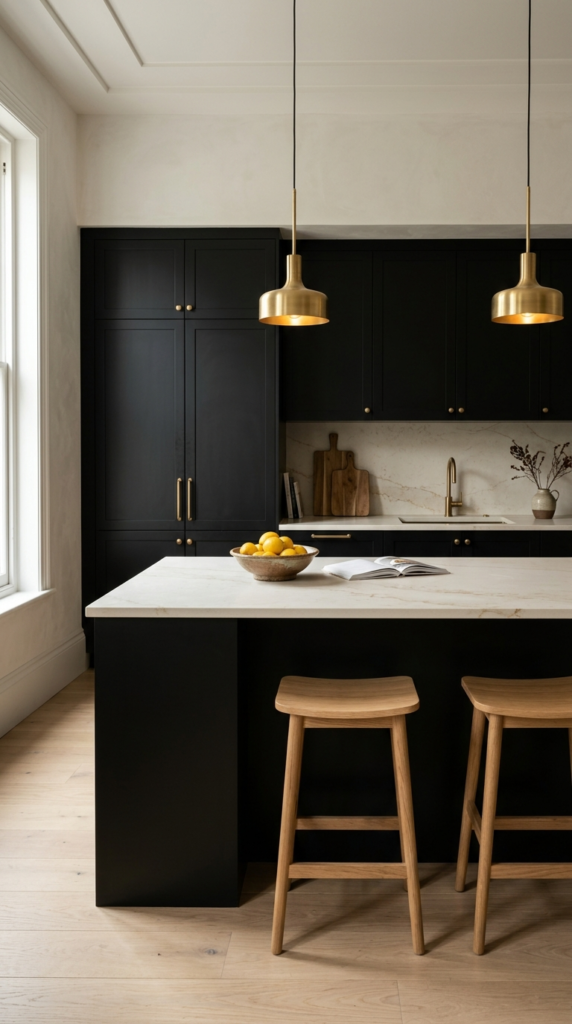
Matte Black Island
- Adds bold contrast and depth to light, airy kitchens
- Hides everyday scuffs better than glossy white finishes
- Makes warm wood and brass details stand out
- Gives the room a strong, designer-style focal point
Dark, bold, and effortlessly chic, a matte black island makes a kitchen feel instantly modern. The deep color grounds the room, so lighter walls, pale floors, and warm wood accents glow beside it. Because matte finishes soften reflections, fingerprints and glare stay under control. Picture a charcoal base with a creamy countertop under warm light, and the contrast looks sharp but never harsh. It works in minimalist, industrial, and even farmhouse kitchens when paired with the right textures. One strong dark piece gives the whole space structure, depth, and a confident, designer-style personality without needing extra decor.
In my experience, matte black looks best when you balance it with warmth. I’ve noticed that wood stools, brass pulls, or a light stone top stop the island from feeling heavy. Choose a durable cabinet paint or a factory finish, because cheap matte paint can show chalky marks from wiping. Keep a microfiber cloth nearby, since dust and water spots are more visible on dark surfaces. Make sure the room has good lighting too, because dark cabinets absorb light. Add two or three pendants overhead, and the island turns into a rich, moody focal point that still feels welcoming.
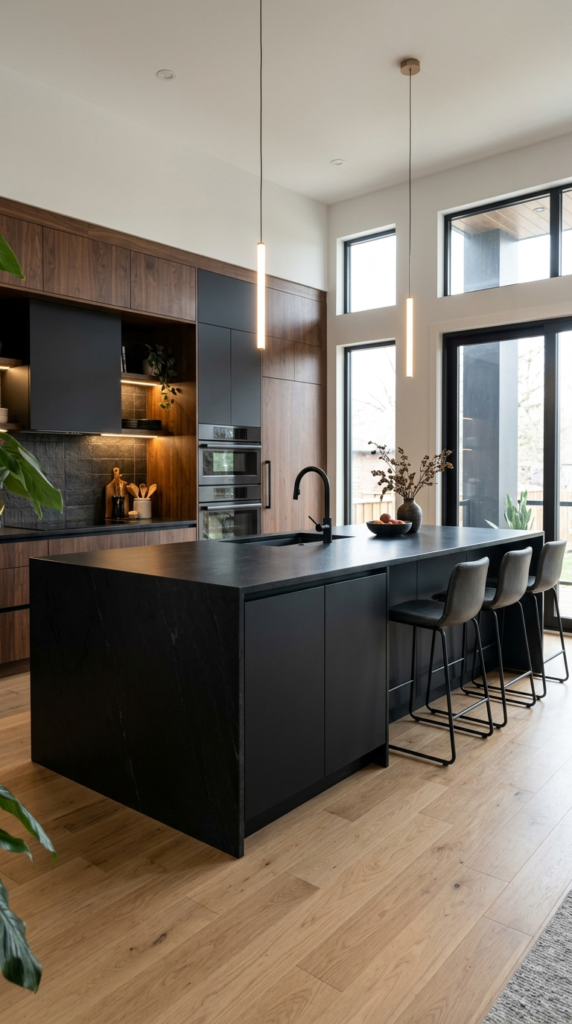
Double Island Layout
- Separates cooking and socializing into two clear zones
- Doubles your counter space for big family meals
- Makes large open-plan kitchens feel balanced
- Needs about 42 inches of walkway between islands
Got a big kitchen and a bigger family? Two islands might be the answer. One island handles cooking, prep, and cleanup, while the second becomes a relaxed gathering spot for homework, snacks, and drinks. The split keeps busy cooks out of the crowd and guests out of the way. Picture two matching bases with different countertops, creating a rhythm that feels planned and balanced. It is a favorite layout for open-plan homes, where a single island can look lost. Together they fill the space, guide traffic gently, and turn entertaining into something easy and fun.
I’ve seen this work well only when the room is generous enough. Leave at least 42 inches between the two islands, and 48 inches if two cooks work together, so nobody bumps into each other. Keep the shapes related, but vary the height, color, or top material to avoid a copy-paste look. Many designers recommend placing the sink and cooktop on one island and the seating on the other. Make sure both islands line up with windows or lighting for a tidy view. If the room feels tight, choose one large island instead, because comfort always beats symmetry.
Image Description: Clean modern kitchen with a white island featuring wide deep pull-out drawers, one open showing neatly organized pots and lids, brushed nickel handles, light gray quartz top, soft daylight, warm pendant glow, pale oak floors, sage walls, front-angle view, tidy functional aesthetic.

Pull Out Drawer Storage
- Brings pots, pans, and lids into easy view
- Saves bending and digging in dark corners
- Keeps counters clear because everything has a home
- Dividers make drawers look as neat as they feel
Digging through a dark cabinet is nobody’s favorite chore. Deep pull-out drawers fix that beautifully. Instead of reaching into shadowy corners, you slide the whole drawer open and see every pot, pan, and lid at a glance. The island front stays clean and simple, yet inside it works like a hidden pantry. Picture wide drawers with soft-close glides and slim handles, all quietly doing their job. It is a small upgrade that changes how the kitchen feels each day, making cooking smoother, faster, and far more relaxed for everyone who uses the space.
In my experience, drawers beat doors almost every time for island storage. I’ve noticed that people reach for pots and bowls daily, and a drawer keeps them close and visible. Choose full-extension, soft-close glides rated for heavy cookware, because cast iron adds real weight. Add wooden or metal dividers to separate lids, pans, and baking sheets. Many designers recommend placing the deepest drawer near the cooktop and shallow ones near the prep area. Skip labels, but group items by task, and the whole island becomes effortless. A little planning here saves years of frustration and keeps the kitchen looking calm.

Conclusion
Your kitchen doesn’t need a full remodel to feel brand new. One smart change, like fresh paint, a statement pendant, or a cozy bench, can make the whole room feel more welcoming. I’ve seen how small updates like these completely transform a space. Now you have 20 kitchen island ideas to spark your imagination and guide your next step. Save this post on Pinterest so you can come back whenever inspiration strikes. Pick one idea and try it in your own home this month. Then share this article with a friend who’s dreaming of a better kitchen. Your best kitchen is closer than you think.