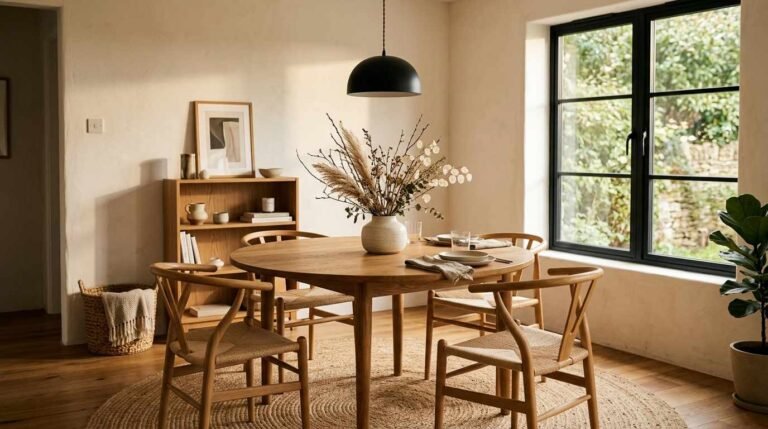
That dusty cabinet in the corner? It could be the most beautiful thing in your home. With the right dining room cabinet decor, a plain piece of furniture becomes a glowing display that guests notice the moment they walk in. Many of us fill our cabinets with whatever fits and hope for the best, and the result feels crowded, flat, or forgotten. I’ve noticed that the fix is rarely a big purchase. It’s usually a smarter layout, a little light, or one unexpected texture. In this guide, you’ll find 24 simple, budget-friendly ideas, from glass-front displays and stacked plates to brass hardware and cabinet-top vignettes. Each one is easy to try in an afternoon, and most use things you already own. Grab your favorite ideas, save them to Pinterest, and get ready to see your cabinet in a whole new way.
1. A Glass-Front China Cabinet Display

- Turns everyday dishes into a room-defining display
- Keeps dust off your favorite pieces
- Adds a soft glow that draws the eye across the room
- Works with any dish style or color palette
- Needs almost no upkeep once it’s arranged
A glass-front cabinet turns everyday dishes into a room-defining display. Instead of hiding your best pieces behind solid doors, you let them glow where guests can see them. This is where dining room cabinet decor starts to feel personal, because every shelf tells a small story about how you gather and eat. Keep the arrangement simple: plates standing at the back, bowls in front, glassware on the top shelf. The glass also protects your collection from dust, so the display stays fresh with almost no upkeep, even in busy family homes that use the dining room daily.
Layering makes a display feel designed. I’ve noticed that placing taller pieces at the back and lower ones in front gives each shelf depth without any extra shopping. Stick to two or three colors so the display reads as calm rather than crowded. Leave a little breathing room between objects, roughly a hand’s width, so every piece can be admired on its own. When the cabinet sits against a plain wall, the collection becomes the focal point of the whole room, and even simple white dishes start to look like a thoughtfully curated gallery from across the table
2. Open Shelving Hutch Styling

- Turns storage into a styled display
- Gives every shelf a clear job
- Mixes function with decor easily
- Keeps daily dishes within reach
- Feels relaxed and welcoming
Open shelves invite you to style, not just store. A hutch with no doors shows everything, so each shelf needs a simple plan. Try one shelf for dishes, one for greenery, and one for small decor like candles or framed photos. This mix keeps the hutch useful for daily meals while still looking pulled together. I’ve noticed that grouping items in threes feels natural to the eye and stops shelves from looking scattered. Leave a few gaps on purpose, because empty space is part of the design. It lets the pieces you love stand out.
Height matters more than most people expect on a hutch. Place your tallest items on the top shelf, mid-size pieces in the middle, and heavy dinnerware at the bottom where it’s easy to reach. This layout is practical and visually balanced at the same time. Add a woven basket or a small plant to soften all those hard ceramic edges. Wood shelves pair well with white dishes, while painted hutches look striking with natural textures. Whatever your style, the goal is a shelf that looks styled but still works for real life. Small changes go a long way.
3. Layered Plate Stacking

- Adds depth to flat shelf rows
- Saves shelf space in compact rooms
- Works with plates you already own
- Creates a collected, gallery-like look
- Easy to restyle in minutes
Stacked plates look like a quiet piece of art. Instead of lining dishes up in a flat row, build small towers of different sizes. A dinner plate at the bottom, a salad plate above it, and a small bowl on top creates instant depth. It also saves shelf space, which matters in compact dining rooms. Choose plates with a shared color or rim detail so the stack feels cohesive. Even mismatched pieces can work when they share the same tone, like all white or all soft blue. The result looks collected, not crowded.
Stacking is easy, but a few habits keep it looking sharp. Keep each stack to three or four pieces so nothing feels wobbly or top-heavy. Place a thin piece of shelf liner or felt between plates if the cabinet gets bumped often. I’ve seen this work well in family homes where the cabinet sits near a busy walkway. Mix textures too: a matte plate under a glossy one adds contrast without adding color. Add a small wooden riser or a cake stand beside the stacks to create a second level. That extra height feels designed.
4. Statement Lighting Inside the Cabinet

- Makes glassware and plates glow
- Adds warmth to the whole dining room
- Needs no bulky fixtures
- Battery options work without outlets
- Lets you set the mood with a dimmer
A little light turns a cabinet into a glowing feature. Slim LED strips tucked under each shelf highlight glassware and plates without adding bulky fixtures. In the evening, the warm glow makes the entire dining room feel calmer and more inviting. Battery-powered puck lights are a great option if there is no outlet nearby. They stick on easily and can be removed without damaging the wood. Choose warm white bulbs around 2700K, since cooler tones can make dishes look flat and harsh. Suddenly your favorite pieces look like they belong in a boutique.
Where you place the light changes everything. Lighting from the front edge of each shelf shows off the whole surface, while lighting from the back creates a soft halo around objects. I’ve tried both, and front lighting works best for everyday dishes. Glass shelves spread the light downward, so every level of the cabinet stays evenly bright. Hide the wires along the cabinet’s inner edge with small adhesive clips for a clean finish. Add a dimmer or a remote so you can lower the glow during dinner parties. Small touches like this make a cabinet feel truly special.
5. Mixing Vintage and Modern Dishware

- Adds character a matching set can’t
- Gives heirlooms a place to shine
- Creates natural conversation starters
- Looks collected rather than bought at once
- Budget-friendly with thrifted finds
Old and new dishes look better together than most people think. A vintage gravy boat beside a sleek matte bowl creates a story that a matching set never could. The trick is choosing a thread that connects them, such as a shared color, shape, or material. White ironstone next to modern ceramic, for example, feels cohesive even across different decades. Family heirlooms fit beautifully into this approach, giving the cabinet warmth and meaning. Guests often ask about the older pieces, which turns your cabinet into a conversation starter. That personal touch is hard to buy.
Balance is the secret to mixing eras successfully. Aim for roughly half vintage and half modern on each shelf so neither style takes over. I’ve noticed that repeating one vintage detail, like gold trim, across a few modern pieces ties everything together. Keep the most delicate antiques on upper shelves, away from everyday reach. Put sturdy modern pieces lower, where you’ll grab them for weeknight dinners. This simple split protects your treasures and keeps the cabinet practical. A neutral shelf background, like white or soft gray, lets both eras shine without clashing or competing for attention.
6. Color-Coordinated Dishware Display

- Creates instant calm and cohesion
- Uses dishes you already own
- Makes shelves look intentional
- Pairs well with a clear room palette
- Costs nothing to try
Color is the fastest way to make a cabinet look intentional. Grouping dishes by shade, such as all blue, all cream, or all sage green, creates a calm, gallery-like effect that works beautifully with formal dining room decor. Your eye moves smoothly across the shelves instead of jumping between clashing patterns. This works especially well in dining rooms with a clear color scheme, like navy walls or warm wood tones. You don’t need to buy anything new to try it. Simply pull out what you already own and sort it by color on the table first. You may be surprised by what appears.
A rainbow display can work, but a limited palette usually looks more polished. Pick two main colors and one accent, then repeat them across every shelf. For example, blue-and-white plates with a few brass candleholders feel classic and fresh together. In my experience, arranging colors from light to dark across the shelf creates a soft gradient that looks surprisingly expensive. If your dishes are mostly white, add color with glassware, linens, or a single ceramic pitcher. Colored glass catches light beautifully and adds a jewel-toned accent without much cost. It’s a small change with a big payoff.
7. Woven Basket Storage Accents

- Adds warm, natural texture
- Hides linens and small items neatly
- Softens hard ceramic and glass
- Pairs with almost any dining style
- Keeps clutter out of sight
Baskets bring softness to a cabinet full of hard surfaces. Wood, glass, and ceramic can feel cold together, and woven texture warms everything up right away, while home decor vases can add another layer of shape and visual interest to the shelves. Use baskets on lower shelves to hide table linens, napkins, or placemats you don’t want on display. They keep small items organized while adding a natural, relaxed look. Seagrass, rattan, and wicker all work well, and they pair beautifully with almost any dining style. A lidded basket also keeps dust off whatever is inside. It is practical storage that happens to look lovely on open shelves.
Size and shape matter when you choose baskets. Measure the shelf height and depth before buying so the basket fits without squeezing against the cabinet doors. Rectangular baskets sit neatly on shelves, while round ones add a softer shape that breaks up all the straight lines. I’ve seen this work well in dining rooms with dark cabinets, where light natural fibers add welcome contrast. Add a small fabric tag or a simple label on each basket for easy sorting. Stick to two or three baskets per cabinet so the look stays intentional and uncluttered.
8. Botanical Greenery on Top of the Cabinet

- Adds life and freshness overhead
- Softens the cabinet’s hard lines
- Faux and dried options need no care
- Draws the eye upward
- Easy to refresh with new stems
The top of a cabinet is prime space for something living. A trailing plant or a leafy branch in a vase softens the cabinet’s hard lines and draws the eye upward. Pothos, ivy, and string of pearls all cascade nicely over the edge. If your room gets little light, faux greenery or dried stems look just as pretty with zero care. Place the plant in a ceramic pot that matches your cabinet finish for a cohesive look. The greenery adds freshness that dishes alone cannot provide, and it makes the whole room feel alive.
Scale and placement keep greenery from looking random. Choose plants that reach about one-third of the cabinet’s height so they feel balanced, not overwhelming. Off-center placement often looks more natural than dead center. Pair the plant with a lower object, like a small bowl or stacked books, to create a gentle triangle shape. I’ve noticed this simple triangle rule makes almost any cabinet top look styled. Water live plants carefully so moisture never touches the wood surface underneath. A small saucer or cork mat under the pot protects the finish for years.
9. Antique Mirror Backing

- Doubles the depth of every shelf
- Reflects light onto glass and silver
- Hides fingerprints better than plain mirror
- Adds an elegant, aged look
- Peel-and-stick versions suit renters
A mirrored back panel makes a cabinet sparkle. Antique mirror glass has a soft, slightly smoky finish that feels far more elegant than a plain mirror. Behind glassware and silver, it reflects light and doubles the visual depth of every shelf. Even a small cabinet suddenly feels grand and full of life. This idea suits traditional and glam dining rooms especially well, though it can also add a surprising edge to modern spaces. The imperfect, aged look hides fingerprints and dust better than a bright new mirror would. That makes it easier to live with.
Installing a mirror back is simpler than it sounds. Many hardware stores will cut mirror panels to size, and peel-and-stick antique mirror tiles are available for renters. Measure the inside back of the cabinet carefully and subtract a quarter inch for easy fitting. In my experience, pairing a mirrored back with warm lighting gives the best glow. Cool bulbs can make the reflections look harsh and a little cold. Style the shelves with fewer, taller items so the reflections don’t feel busy or confusing. Crystal glasses, silver trays, and white dishes look beautiful against this soft, shimmering backdrop
10. Brass Hardware Upgrade

- Lifts a tired cabinet instantly
- Takes about twenty minutes
- Needs no paint or new furniture
- Pairs with wood, navy, and green
- One of the cheapest upgrades here
Tiny hardware, big transformation. Swapping old knobs and pulls for brushed brass instantly lifts a tired cabinet without any painting or new furniture. Brass adds a warm, slightly luxe glow that pairs beautifully with wood, navy, forest green, and cream. The project takes about twenty minutes with a screwdriver. Most cabinets use standard hole spacing, so you can usually swap pulls one for one without drilling. Check the center-to-center measurement first, since that number decides whether new pulls will fit. It’s the easiest upgrade on this list, and the results show right away.
Finish and style shape the final look. Brushed or satin brass feels modern and soft, while polished brass looks more traditional and formal. Cup pulls suit classic cabinets, and slim bar pulls work better on clean-lined, contemporary pieces. I’ve noticed that repeating the same brass tone in a nearby light fixture or picture frame ties the whole room together. You don’t need to match perfectly, but staying in the same warm family helps. Buy one extra pull in case a piece is damaged during installation or measured slightly off. Small planning saves a lot of frustration.
11. Layered Trays and Platters

- Groups small items into tidy vignettes
- Adds height and dimension
- Makes cleaning quick
- Works in wood, marble, or metal
- Keeps shelves looking organized
Trays are the easiest way to make a cabinet look organized. A tray groups small items, like salt shakers, candles, and small bowls, into one tidy vignette. Large platters can stand upright at the back of a shelf, acting like art behind everything else. Layer a small tray on top of a bigger platter for extra dimension and interest. Wood, marble, and metal trays each bring a different mood, from rustic to polished. Best of all, trays make cleaning simple, since you can lift a whole group at once. Style stays intact, and dusting takes seconds.
Layering works best when you follow a simple pattern. Start with the largest platter as your base, add a medium tray next, then finish with one or two small objects. This stepped look adds height and keeps the eye moving across the shelf. I’ve seen this work well on cabinet tops, where a large wooden tray holds a pitcher, a candle, and a small plant. Choose trays with raised edges so items stay put if the cabinet is bumped. Keep colors limited and repeat one material, like wood or brass, so everything looks connected.
12. Cabinet as a Bar Cart Alternative

- Saves floor space in small rooms
- Hides bottles behind closed doors
- Keeps drinks close to the table
- Makes hosting feel effortless
- Looks polished, not cluttered
Who says a bar cart has to roll? A dining room cabinet can hold your drinks in style, and it hides bottles behind doors when you’d rather not display them. Set a tray on the counter surface with a few glasses, a shaker, and an ice bucket for an instant drinks station. Inside, dedicate one shelf to bottles and another to stemware. This setup saves floor space, which makes it ideal for smaller dining rooms. It also keeps everything close to the table, so hosting feels effortless. Guests always love a drinks corner that looks polished.
Function and style can share the same cabinet. Use the top for everyday items, like a decanter and two glasses, and store the rest inside. I’ve tried keeping ice buckets and serving trays in the bottom section, and it made hosting so much smoother. A small lamp or candle on top adds a warm, bar-like glow in the evening. Add a cutting board and a bowl of lemons or limes for color and practicality. Protect the surface with coasters or a tray so spills never reach the wood finish. That keeps the cabinet looking beautiful for years.
Stocking a Cabinet Bar Nook
Start with the basics: one spirit you enjoy, a bottle of sparkling water or wine, and a small set of matching glasses. Store heavier bottles low and lighter glassware high. I’ve noticed that fewer, better-looking bottles feel more elegant than a crowded collection. Keep bitters, garnishes, and small tools in a lidded box or tray so the nook stays neat. Refresh the supplies before gatherings rather than keeping everything stocked all the time.
13. Symmetrical Cabinet Styling

- Creates instant calm and order
- Easy formula anyone can follow
- Works on tops and inside shelves
- Suits traditional and modern rooms
- Feels balanced from every seat
Symmetry is calm, classic, and surprisingly easy. Place matching lamps, vases, or candlesticks on either side of a center piece, and the cabinet instantly looks balanced. Your eye rests easily on a mirrored arrangement, which is why formal spaces often rely on it. Try a framed print or mirror in the center with identical pieces flanking it. The formula works on both cabinet tops and inside shelves. It suits traditional dining rooms beautifully, but crisp, modern pieces in a symmetrical layout look striking too. Order feels good in a room where people gather.
Perfect symmetry needs careful measuring. Use a tape measure to find the cabinet’s center, then place your main piece there first. Add matching pairs outward, keeping the same distance on each side. I’ve noticed that even a half-inch difference is easy to spot in a symmetrical layout, so it’s worth taking your time. To keep it from feeling stiff, vary the objects slightly in texture or height while keeping the overall structure matched. A pair of tall candlesticks with a low bowl in the middle creates a lovely, layered rhythm. Simple, tidy, and timeless.
14. Seasonal Cabinet Decor Rotation

- Keeps the room fresh all year
- Needs only a few small swaps
- Fits any budget
- Uses natural, low-cost elements
- Makes guests notice the change
Your cabinet can change with the seasons, no renovation needed. Swap a few small items each season, like a wreath in winter, tulips in spring, or pumpkins in autumn. The dishes and larger pieces stay the same, so the effort stays small. This keeps the room feeling fresh all year without a big budget. Choose one seasonal color to repeat, such as soft green in spring or warm rust in fall. Repeating that shade across a few small objects makes the change feel coordinated and effortless. Guests notice the change right away.
Storage makes rotating decor sustainable. Keep one labeled bin for each season in a closet, so swapping takes only a few minutes. I’ve seen this work well in homes where the dining room is used often, since the cabinet always feels current. Start small if the idea feels like too much work. Even changing just one shelf or the cabinet top makes a visible difference. Natural elements like pinecones, dried grasses, and fresh branches cost little and look beautiful. Add a candle in a seasonal scent, and the room feels welcoming before anyone sits down to eat.
15. Formal Dining Room Decor Pairing

- Matches the cabinet to the room’s mood
- Brings out crystal, china, and silver
- Uses a refined, rich palette
- Ties in with chandeliers and drapery
- Feels timeless and elegant
A formal dining room deserves a cabinet that matches its mood. Think crystal glassware, fine china, silver serving pieces, and tall candlesticks arranged with care. These traditional elements echo the chandelier, the drapery, and the polished table, so everything feels connected. The cabinet becomes part of the room’s story rather than a separate piece of furniture. Keep the palette refined, with cream, gold, deep green, or navy. Rich, muted tones give the room a sense of occasion without feeling stuffy. Everything should always look ready for a special holiday dinner with guests.
Formal doesn’t have to mean stiff. Balance elegant pieces with a few relaxed touches, like fresh flowers, a linen runner, or a simple wooden bowl. In my experience, this mix makes a formal room feel welcoming, not intimidating. Display your best china in the center of the cabinet, where the eye lands first. Use lower shelves for everyday pieces that support the formal set, like serving bowls and pitchers. Keep hardware, frames, and metal accents in a matching finish for a polished, coordinated appearance. The final look feels timeless and quietly luxurious.
16. Corner Cabinet Nook Styling

- Uses forgotten corner space
- Shows off round items beautifully
- Gives the room a finished look
- Draws the eye upward
- Works in any size of room
Corners are often forgotten, and that’s a missed opportunity. A corner cabinet fits into unused space and instantly gives the room a purposeful, finished look. Because the shape is triangular, curved or angled shelves show off round items, such as bowls, vases, and plates, especially well. Keep the styling simple, with a few large pieces rather than many tiny ones. Tiny objects get lost in corners, while larger items look intentional. Add a small plant or a tall vase on top to draw the eye upward and soften the corner. A dull corner becomes a feature.
Corner cabinets need a slightly different styling approach. Angle your items a little toward the room so they’re visible from the table, not just from the front of the cabinet. I’ve noticed that plates displayed on small stands look best on corner shelves, since they face the room naturally. Lighting helps too, because corners are usually the darkest part of a room. A small battery light or a nearby lamp makes the nook feel warm and inviting. Choose a cabinet finish that matches the room’s other wood tones so the corner blends in smoothly.
17. Painted Cabinet Color Pop

- Cheapest makeover on the list
- Gives an old piece new life
- Adds personality to neutral rooms
- Works as a weekend project
- Pairs with new hardware for a custom look
Paint is the most affordable makeover there is. A cabinet painted in deep green, navy, or dusty rose becomes the star of the room. If your walls are neutral, a colorful cabinet adds personality without any extra decor. If your walls are already bold, a soft white cabinet keeps things balanced. Either way, the color gives an older piece brand new life. A dated oak cabinet from a secondhand shop can look custom-made with a fresh coat and new hardware. It’s a simple weekend project that delivers a truly dramatic result.
Good prep makes painted furniture last. Clean the surface well, sand lightly, and apply a bonding primer so the paint sticks to old finishes. In my experience, skipping primer is the most common mistake, and it leads to peeling within months. Choose a durable satin or semi-gloss finish, since dining rooms see plenty of spills and touching. Paint the inside of the cabinet a lighter shade if you want dishes to stand out clearly. Or go bolder and match the inside to the outside for a rich, cocooning look. Let the paint cure fully before loading shelves.
18. Cookbook and Linen Storage

- Turns necessities into decor
- Keeps everyday items within reach
- Adds a soft, spa-like look
- Works with any dining palette
- Storage that looks like styling
Cookbooks and linens are pretty when they’re styled well. Stack cookbooks with the spines facing out, or lay a few flat with a small object on top. Fold linen napkins and tablecloths neatly, and arrange them by color for a soft, spa-like look. This turns everyday necessities into decor, and it keeps them within reach when you need them. Cream, white, and soft gray linens pair with nearly any dining palette. A tied ribbon or a simple twine wrap around a napkin stack adds a thoughtful finishing detail. Storage that looks like styling is always a win.
Organization keeps this idea looking effortless. Group cookbooks by size or color so the shelf looks tidy, not chaotic. Use bookends or a small decorative object to keep them upright. I’ve seen this work well in dining rooms that double as a family gathering space, where recipes and linens get used constantly. Store seasonal linens on a higher shelf and everyday napkins at hand level. Add a small basket for placemats, so table setting stays quick and simple. A tiny herb pot or candle on top of the stack brings a little charm without cluttering the shelf.
19. Framed Art Leaning Against the Cabinet

- Needs no drilling or measuring
- Easy to swap anytime
- Great for renters
- Creates layered depth
- Looks relaxed and effortless
Leaning art feels relaxed, layered, and effortless. Instead of hanging a frame, rest it against the wall on top of the cabinet. There’s no drilling, no measuring, and no commitment. You can swap the artwork whenever you like, which makes it perfect for renters and frequent redecorators. A large frame at the back, a smaller one in front, and a candle or vase beside them creates depth. Overlapping the frames slightly makes the arrangement feel collected over time. It’s a designer trick that anyone can easily copy in about five minutes.
Stability matters when art isn’t nailed down. Place the largest frame at the back and add a small piece of museum putty under the bottom edge to stop sliding. I’ve noticed that frames with thin profiles look more modern, while wider frames feel more traditional. Choose art that repeats colors from your dishes or linens so everything feels connected. Landscapes, botanical prints, and abstract pieces all work well in dining spaces. Keep the height of the art in proportion to the cabinet, roughly one-third taller than the objects beside it. Then step back and adjust.
20. Candle and Candlestick Display

- Adds warmth and movement
- Looks lovely even when unlit
- Reflects beautifully off glass
- Flameless options keep it safe
- Easy to match to any palette
Candlelight makes any dining room feel special. A group of candlesticks in different heights on your cabinet adds warmth and movement. Brass, glass, wood, and ceramic holders each set a different mood, from elegant to rustic. Odd numbers work best, so try three or five candlesticks clustered together. Mix tall tapers with short pillar candles for a layered, collected look. Flickering light also reflects beautifully off glassware and mirrored backs, giving the cabinet a gentle evening glow. Even unlit, the candlesticks add graceful vertical lines that draw the eye upward and give the display a finished, elegant feel.
Safety and style go hand in hand with candles. Keep flames away from curtains, shelves above, and anything flammable, and never leave burning candles unattended. LED flameless candles are a great alternative for families with kids or pets. I’ve tried flameless tapers in a tall cabinet, and honestly, guests couldn’t tell the difference at a glance. Choose candle colors that match your palette, such as ivory, sage, or deep burgundy. Place candlesticks on a small tray to catch drips and keep the finish protected. A little care keeps the display beautiful and worry-free.
21. Wallpaper Backing Inside the Cabinet

- Adds a hidden pop of pattern
- Needs only a small amount of paper
- Peel-and-stick is renter-friendly
- Makes white dishes stand out
- Gives a custom, one-of-a-kind feel
A hidden pop of pattern is the best kind of surprise. Lining the inside back of your cabinet with wallpaper adds color and personality exactly where you see it most. Floral, botanical, or geometric prints all make dishes stand out. Because you only need a small amount, even a premium roll becomes affordable. Peel-and-stick options make the project simple, and they come off easily if you change your mind. White dishes look especially striking against a bold or dark pattern. The cabinet suddenly feels custom, personal, and truly one of a kind.
Choosing the right pattern takes a little thought. Match the scale of the print to the size of the cabinet, using small patterns for compact cabinets and larger prints for roomy ones. I’ve noticed that a pattern with two or three colors from your dishes feels the most cohesive. Test a small sample against your plates before committing to a full roll. Measure the back panel and cut the wallpaper slightly larger, then trim for a clean edge. Smooth out air bubbles with a card as you go, working from the center outward
22. Curated Small Collections

- Makes the cabinet personal
- Turns shelves into conversation starters
- Builds slowly with thrifted finds
- Feels meaningful, not random
- Easy to rotate and refresh
A small collection tells a big story. Gather items that share a theme, like vintage salt cellars, small brass animals, or antique teacups, and group them together. One shelf of meaningful objects feels far more personal than a shelf of random decor. Displaying a collection also turns your cabinet into a conversation starter. Guests love asking where the pieces came from. Flea markets, thrift stores, and family attics are wonderful places to build a collection slowly over time. There’s no rush, and each new find adds another chapter to the story your dining room tells.
Editing is what makes a collection look curated. Display only your best pieces and keep the rest stored away, rotating them in when you want a change. I’ve seen this work well when a collection sits on a single shelf, with plenty of space around it. Too many objects crowd each other and lose their impact. Use small stands, risers, or a mirror behind the items to add dimension and make them easier to see. Group items by color or material for the cleanest, most cohesive look. Simple, focused, and full of character.
23. Cabinet Top Vignette Styling

- Turns the top into a styled scene
- Uses a simple mix of heights
- Lets you add personal touches
- Takes only minutes
- Works on any cabinet size
The top of your cabinet is a stage, so style it like one. A vignette combines three or four objects of different heights, like a lamp, a stack of books, and a small vase. Together they create a small scene that feels full of life. This is where dining room cabinet decor gets to be truly personal, since you can add photos, souvenirs, or handmade items. Anchor the arrangement with something tall, add something round, and finish with something textured. That simple recipe works in nearly every dining room. It takes only minutes to put together.
Great vignettes feel balanced without being perfectly matched. Arrange objects in a loose triangle, with the tallest item off to one side and shorter ones stepping down. That shape guides the eye naturally across the surface. I’ve noticed that odd numbers, especially three, make almost every vignette look more natural. Vary materials so the grouping doesn’t feel flat, pairing something smooth like ceramic with something rough like wood. Leave a little open surface around the edges so the arrangement can breathe. Then step back, squint slightly, and see whether anything feels too heavy on one side.
Balancing Height and Scale
Aim for the tallest object to be roughly one and a half times the height of the second tallest, so the arrangement has clear rhythm. On a low cabinet, keep everything modest so the vignette doesn’t block the view across the room. On a tall cabinet, go bigger with a large lamp or oversized vase so nothing looks lost. I’ve noticed that stepping back and checking the view from a chair at the table is the quickest test.
24. Mixing Ceramic, Glass, and Wood Textures

- Adds richness without extra color
- Catches light in different ways
- Balances soft and sleek finishes
- Great for neutral rooms
- Easy to build from what you own
Texture is what makes a cabinet feel rich and layered. Ceramic brings a soft, matte quality, glass adds sparkle and transparency, and wood contributes warmth. Together, they create a display that feels balanced and full of visual interest. Try a ceramic pitcher beside a glass carafe, with a wooden bowl in front. Each material catches light differently, so the shelf looks dynamic throughout the day. This works even in a limited color palette, since texture does the work that color usually would. Neutral rooms especially benefit from this simple, thoughtful approach.
Repetition helps three materials feel like one story. Use each material at least twice on a shelf so nothing looks like a random guest. In my experience, two ceramic pieces, two glass pieces, and two wood pieces per shelf is a reliable starting point. Stagger them so the same material doesn’t sit side by side. Keep the finish of each material consistent, such as matte ceramics and natural wood, for a calm feel. Add one accent, like a brass candlestick or a green plant, to lift the whole arrangement. The finished look feels warm and layered.
FAQs
1. What items should I display in a dining room cabinet?
Start with pieces you love and actually use, like fine china, glassware, serving bowls, and pitchers. Then add a few personal touches, such as candles, small plants, or a framed photo. Keeping a mix of practical and decorative items makes the cabinet both useful and beautiful.
2. How do I style open shelves inside a dining room cabinet?
Give each shelf a simple job, such as dishes on one, greenery on another, and small decor on a third. Group items in odd numbers, vary the heights, and leave a few gaps. I’ve noticed that this alone makes most shelves look styled.
3. What colors work best for a dining room cabinet?
Soft whites, creams, and warm woods are classic and easy to style. If you want a bolder look, deep green, navy, or dusty rose make the cabinet a feature. Pick a color that either contrasts with or gently complements your wall color.
4. Should dining room cabinets match the dining table?
Not exactly. A slightly different wood tone or finish often looks more collected than a perfectly matched set. What matters is that the tones share a similar warmth or coolness so the pieces feel related.
5. How can I add lighting to a dining room cabinet?
Slim LED strips under the shelves are the simplest option, and battery-powered puck lights work when there’s no outlet nearby. Choose warm white bulbs around 2700K so dishes and glassware look inviting rather than harsh.
6. What’s a simple way to update an old dining room cabinet?
Swapping the hardware for brushed brass takes about twenty minutes and makes an instant difference. For a bigger change, add a fresh coat of paint or line the inside back with peel-and-stick wallpaper.
7. How do I avoid a cluttered look inside my cabinet?
Edit before you arrange. Display only your best pieces, keep about a third of each shelf empty, and group items by color or material. Use baskets to hide smaller items you don’t want on show.
8. Can I use a dining room cabinet for storage and decor together?
Yes, and that’s often the smartest approach. Keep display pieces on upper shelves, store everyday items in baskets or closed sections below, and use the cabinet top for a small vignette.
9. What decor styles work well for dining room cabinets?
Nearly every style works, from traditional and farmhouse to modern and eclectic. Traditional cabinets suit crystal and china, while modern ones look best with clean ceramics and fewer objects. Choose one style and repeat its colors and materials.
10. How often should I refresh my dining room cabinet decor?
Once or twice per season is plenty. Swapping a few small items, like flowers, candles, or a wreath, keeps the cabinet feeling current without a full restyle. The main dishes and larger pieces can stay in place all year.
Conclusion
Your cabinet doesn’t need a full makeover to feel special. A few stacked plates, a warm glow, or a fresh coat of paint can change how your dining room feels. I’ve seen how small changes like these turn ordinary furniture into the heart of a home. The best dining room cabinet decor always reflects the people who use it, so choose what you love and let it shine. Save this post on Pinterest so your favorite ideas are ready when inspiration strikes. Try one idea this weekend, and share this article with a friend who’s ready to refresh their space.