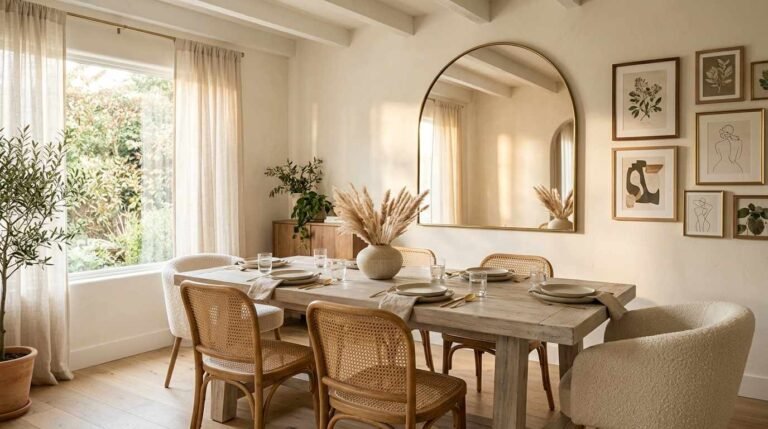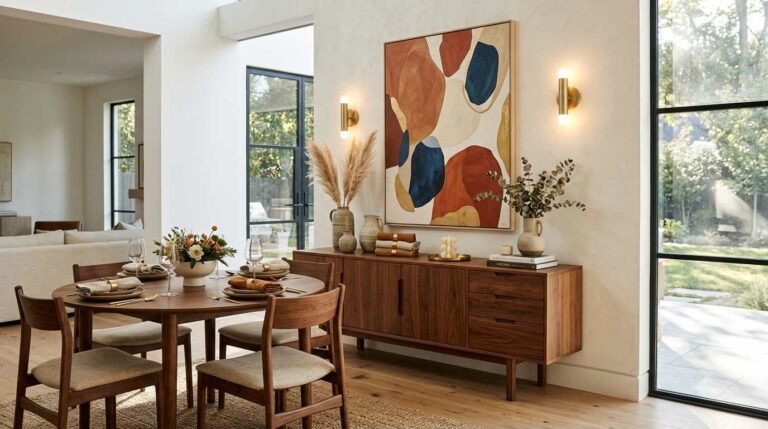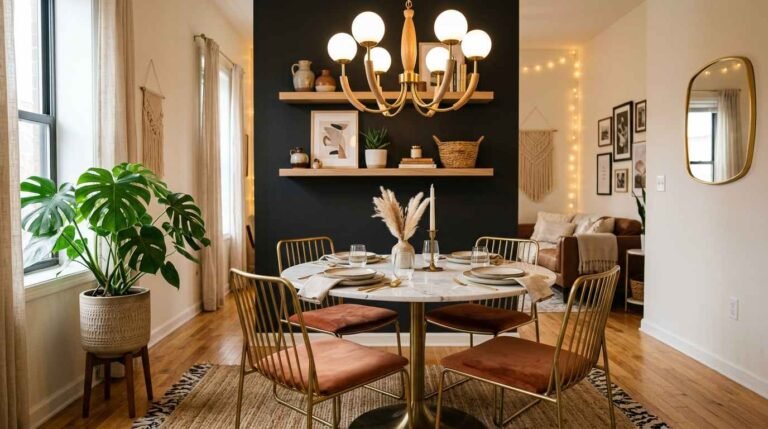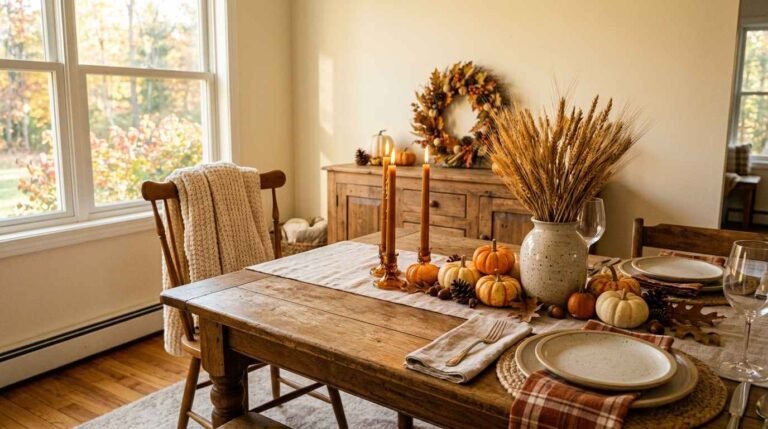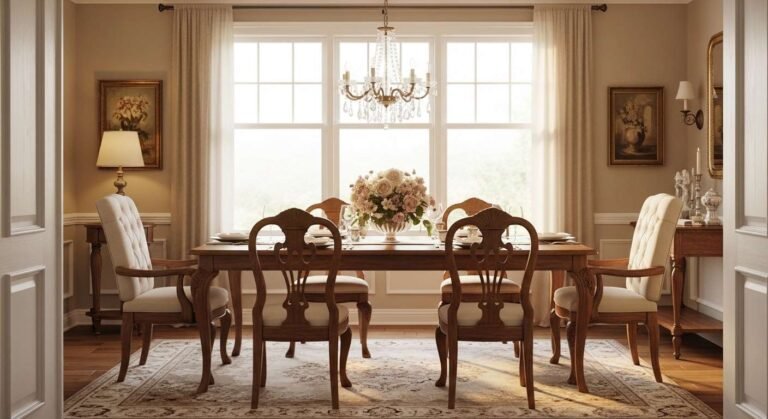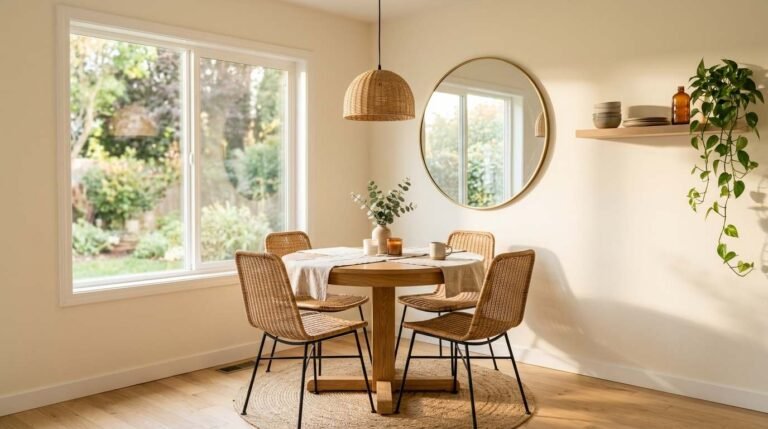
A vintage dining room works best when it looks collected over time, not bought in one afternoon. These vintage dining room decor ideas are grouped by era, so you can pick the decade that fits your home and your furniture. The 1920s bring shine and formal lines, the 1950s bring soft colour and cheerful pattern, and the 1970s bring warm wood, wool and layered texture. Start with one group, save the pictures you like to Pinterest, and build the room piece by piece.
How to Use Vintage Dining Room Decor Ideas by Era
Pick one era as your lead and let the other two play a small supporting part. If your table is dark oak with turned legs, 1920s glamour will suit it. If your walls are pale and your chairs are painted, 1950s charm will feel right. If your floor is warm timber and you love deep colour, 1970s warmth will ground the room. Keep the palette to three main colours, repeat one metal finish, and leave at least 24 inches of clear space around the table so chairs pull out without hitting the wall.
1920s Glamour: Vintage Dining Room Decor Ideas With Art Deco Shine
The 1920s dining room was formal without being stiff. Think polished wood, cut glass, brass, silver and black and white contrast. Geometric shapes, stepped edges and fan motifs show up in mirrors, light fittings and frames. Choose two or three polished pieces and keep the rest simple, so the shine has room to stand out.
1. Antique Wood Dining Table

- Look for a solid oak or walnut top, 72 to 84 inches long, that seats six to eight people.
- Check that the legs are firm and the joints do not wobble before you buy.
- Keep the wood oiled with a soft cloth so the patina stays rich and even.
A 1920s table sets the tone for the whole room. Dark oak with turned legs, a walnut top with a satin finish, or a mahogany table with a central pedestal all read as period pieces. The small marks and worn edges are part of the appeal, and they make the table feel lived in from the first meal.
Measure before you shop. Allow 24 inches of table length per person and 36 inches of clearance behind each chair. A table 84 inches long by 40 inches wide works well in a room that is at least 12 by 14 feet. Put a simple linen runner down the centre and let the wood show at the edges.
2. Crystal Chandelier Centerpiece

- Hang the bottom of the chandelier 30 to 36 inches above the table top.
- Choose a width about one half to two thirds of the table width.
- Use warm white bulbs, 2700 kelvin, so the glass glows instead of glaring.
Cut crystal was the centrepiece of 1920s dining, and a chandelier still does that job better than any other light. Prisms catch candlelight and daylight and throw small bright spots across the ceiling. A fixture with brass arms and clear crystal drops suits a dark wood table and a pale ceiling.
Have an electrician check old wiring before you hang a secondhand chandelier. Clean the crystals one at a time with a damp microfibre cloth and warm water, and dry them straight away to avoid water spots. A dimmer switch helps you move from bright family meals to a softer evening light.
3. Vintage China Cabinet Display

- Group plates by one shared colour, such as blue and white, even if the patterns differ.
- Stand larger plates at the back and stack smaller plates in front.
- Leave breathing space on each shelf so the display reads as curated, not crowded.
A glass front cabinet turns plates, teacups and serving dishes into wall art. In a 1920s room, hand painted plates with gold rims, white porcelain with a blue border, and a few clear glass pieces work together. The glass doors keep dust off the pieces while letting you see them every day.
Put the cabinet on the longest wall, at least 12 inches from a doorway, and anchor it to the wall if the floor is uneven. The same display approach also suits a living room dining room combo decor layout, where the cabinet marks the edge of the dining area without blocking light. Keep the most delicate pieces on the top shelf, out of reach of small hands.
4. Heirloom Silverware Display

- Polish silver with a soft paste polish and a cotton cloth, not a harsh dip.
- Store serving pieces in a lined drawer or a felt roll to slow tarnish.
- Use the pieces at the table, not only on display, so they stay part of daily life.
Silverware passed down through a family carries a history no new set can copy. A 1920s service in sterling silver or silver plate, with a simple beaded edge or a fan pattern, looks right beside a dark wood table and white china. A few serving spoons, a cake server and a small tray are enough to make the point.
Display a tray and two or three serving pieces on the sideboard, and keep the rest in a lined box. A light tarnish in the engraved lines actually helps the pattern show, so polish gently and leave the detail alone. Wash silver by hand in warm soapy water and dry it at once.
5. Old-World Candlesticks and Candelabras

- Mix heights of 8, 10 and 12 inches so the group looks collected, not matched.
- Use ivory taper candles in brass or silver holders for a classic 1920s look.
- Keep candles at least 12 inches from curtains, paper and dried flowers.
Brass candlesticks and a silver candelabra give a dining table its evening glow. In the 1920s, a pair of tall candlesticks marked the centre of the table, and a three arm candelabra marked a special occasion. The metal reflects the chandelier above and warms the wood below.
Set the candlesticks on a small silver tray to catch wax drips, and trim the wicks to a quarter inch before lighting. For everyday use, flameless taper candles in the same brass holders give the same look without the flame. Store spare candles in a cool drawer so they do not bend.
6. Lace Tablecloth Styling

- Choose a cloth that drops 8 to 10 inches over the table edge.
- Layer white lace over a solid ivory or pale grey cloth for contrast.
- Hand wash lace in cool water and dry it flat on a clean towel.
Lace was a 1920s table staple, and a fine cotton lace cloth still softens a dark wood table in a way plain linen cannot. The open pattern lets the wood show through, and the scalloped edge gives the table a finished line. A cream or ivory lace works with brass, silver and white china.
For everyday meals, use the lace as a runner instead of a full cloth, so it stays clean longer. Iron it on a low setting with a thin cotton cloth between the iron and the lace. If you find an old lace cloth with a small tear, a fine needle and matching cotton thread will repair most damage.
7. Vintage Portrait or Oil Painting Display

- Hang the centre of the painting 57 to 60 inches from the floor.
- Pick a gilt or carved wood frame 2 to 3 inches wide.
- Choose tones that echo a colour already in the room, such as warm gold or deep green.
A 1920s dining room often had one formal painting above the sideboard or on the main wall. An oil portrait or a landscape in a gilded frame brings a quiet weight to the room, and the visible brushwork adds texture that a print cannot match. Unsigned period paintings are common at estate sales and are often the most affordable way to get a real oil painting.
Hang the painting where it gets indirect light, not direct sun, so the colours do not fade. Use two picture hooks for a frame wider than 24 inches, and check that the wire is sound before you lift it. A single large painting, 30 by 40 inches, usually works better than three small ones on the same wall.
8. Vintage Mirror Wall Feature

- Hang a mirror 36 to 48 inches wide above a sideboard of the same width.
- Place it opposite a window so it doubles the daylight in the room.
- Look for a stepped or fan shaped Art Deco frame in gold or aged brass.
An Art Deco mirror fits the 1920s group perfectly. The geometric frame, in gold, silver or black lacquer, reads as a piece of art on its own, and the glass brightens a room that has dark wood and heavy curtains. A mirror with a foxed or lightly aged surface looks period correct and hides small marks.
Fix the mirror to a wall stud with a proper hook, because an old mirror with a solid wood frame can weigh 20 pounds or more. Hang it so the centre sits at eye level, about 60 inches from the floor. Avoid placing it where it will reflect a cluttered corner or a television.
1950s Charm: Vintage Dining Room Decor Ideas in Soft Pastels and Pattern
The 1950s dining room was lighter, brighter and a little more playful. Pastel paint, cheerful floral fabric, glassware in soft colours and furniture with slim legs replaced the heavy formality of the 1920s. This group suits a room with good daylight, painted furniture and a table that gets used every day.
9. Retro Pastel Color Palette

- Paint the walls mint green, dusty rose or pale butter yellow, and keep the ceiling white.
- Test a paint swatch on the wall and check it in morning and evening light.
- Repeat the pastel in only two places, such as chairs and curtains, so it stays calm.
Pastel colour is the fastest way to give a dining room a 1950s feel. Mint green walls with a white ceiling, dusty rose chairs, or a pale yellow tablecloth all carry that soft, optimistic look. The colours work best beside warm wood or painted white furniture, and they make a small room feel larger.
Use one pastel as the main wall colour and a second pastel as an accent, with white as the third colour. That keeps the room from looking like a sweet shop. If you paint the walls, use a satin finish so you can wipe off food marks, and keep the trim in a clean white for a crisp edge.
10. Mismatched Vintage Chairs

- Keep every chair seat at the same height, 17 to 19 inches from the floor.
- Hold the set together with one shared paint colour or one fabric.
- Check each chair for loose joints and tighten the screws before you paint it.
1950s dining chairs were often bought one or two at a time, so a mixed set looks right for the era. A wooden chair with a spindle back, a bentwood chair, and a painted chair with a vinyl seat can sit at the same table if they share a seat height and one colour. The result feels collected, not careless.
Paint the chairs in the same pastel, or re-cover the seats in the same cotton fabric, to give the set a clear link. That shared detail also works well with natural home decor, where wood, linen and cotton keep the room feeling fresh. Sand each chair lightly, prime it, and apply two thin coats of paint for a smooth finish.
11. Vintage Glassware Collection

- Display green, pink and amber Depression glass together on one shelf.
- Put milk glass vases and small bowls at the front, where their white colour stands out.
- Wash glass by hand and dry it with a lint free cloth to keep it clear.
Coloured glass was a 1950s table staple. Depression glass in green, pink and amber, along with white milk glass, adds colour to a shelf or a table without taking up much space. The pieces catch light from a window and cast small coloured patches on the wall, which is part of their charm.
Group the glass in odd numbers, three or five pieces to a shelf, and leave space between groups. A shelf 24 inches long holds about five tumblers or three larger vases comfortably. Check each piece for chips on the rim before you buy it, and keep the most fragile pieces away from the edge.
12. Damask or Toile Patterned Upholstery

- Cover chair seats in a damask with a repeat of 6 to 8 inches, so the pattern reads clearly.
- Choose a toile in soft blue or warm grey on white for a light 1950s look.
- Use a stain resistant finish on seat fabric, since dining chairs take daily wear.
Damask and toile were popular 1950s fabrics, and they still give dining chairs a polished look. Damask has a woven pattern that catches the light, while toile shows small pastoral scenes in one colour on a white ground. Both work in muted tones, such as soft blue, sage green or dusty rose.
Re-covering a chair seat is a simple job. Remove the seat, cut the fabric 3 inches larger than the seat on each side, staple it to the underside, and trim the excess. A cotton or cotton blend fabric with a tight weave will hold up better than a loose weave, and it is easier to clean.
13. Vintage Curtains and Drapery

- Hang curtains 4 to 6 inches above the window frame and let them touch the floor.
- Pick a floral or damask cotton in a pastel that matches one chair colour.
- Use brass tiebacks to hold the panels back during the day.
1950s curtains were often made in cotton with a small floral or damask print, and they softened the room without blocking light. Floor length panels in a pale floral, hung from a simple brass rod, frame the window and repeat the pattern from the chair fabric. The fabric filters daylight into a warm glow.
Measure the window width and multiply by 1.5 to 2 for full panels, so the fabric gathers properly. A window 48 inches wide needs two panels of about 36 to 48 inches each. Line the curtains in white cotton if the fabric is thin, so the pattern does not fade in strong sun.
14. Floral Vintage Wallpaper

- Use the pattern on one accent wall, behind the sideboard, to keep it from overwhelming the room.
- Pick a small floral repeat, 4 to 6 inches, for a small room and a larger repeat for a big wall.
- Order one extra roll beyond your measurement, so the pattern matches at the seams.
Floral wallpaper was a fixture of 1950s dining rooms, and a modern reproduction in a faded rose, sage or butter yellow still works. The pattern adds colour and softness to a plain wall, and it pairs well with painted white furniture and a simple wood table. A peel and stick version is a good choice if you rent.
Measure the wall height and width, divide by the roll coverage on the packaging, and add 10 percent for waste. Wash the wall, fill any holes, and let it dry before you start. Start papering at the corner farthest from the door, and use a sharp blade to trim the top and bottom edges cleanly.
15. Antique Sideboard Styling

- Style the top in three groups: a lamp or vase, a stack of books, and a small plant.
- Keep the top clear in the middle, so you can use it for serving at dinner.
- Check the drawers run smoothly and the doors close flat before you buy.
A 1950s sideboard, in teak, walnut or painted white, gives a dining room storage and a serving surface in one piece. The drawers hold cutlery and table linen, the cupboard holds serving dishes, and the top holds a lamp, a vase and a few books. A sideboard 48 to 60 inches long suits most dining rooms.
Place the sideboard against the wall opposite the table, with at least 36 inches between it and the chairs so you can walk behind a seated person. If the wood is scratched, a wood marker in a matching tone will hide most small marks. Keep the heaviest items in the bottom cupboard, not on the top.
1970s Warmth: Vintage Dining Room Decor Ideas in Wood, Wool and Warm Colour
The 1970s dining room was warm, textured and a little earthy. Reclaimed wood, wool rugs, warm browns and oranges, botanical prints and low pendant lights replaced pastel and shine. This group suits a room with timber floors, a brick wall or a fireplace, and it works well for long, relaxed meals.
16. Vintage Rug Layering

- Size the rug so all chair legs stay on it, even when a chair is pulled out 18 inches.
- Layer a smaller patterned rug, 5 by 7 feet, over a larger plain jute rug, 8 by 10 feet.
- Use a rug pad underneath to stop slipping and to protect a wood floor.
Layered rugs are a 1970s trick that adds warmth underfoot and colour under the table. A faded Persian style rug in rust, brown and cream, laid over a plain jute or wool rug, gives the floor depth without needing a single expensive piece. The faded colours suit warm wood and brass.
For a table 72 inches long, a rug 96 inches long by 72 inches wide is a good starting size. Vacuum the rug on a low setting and blot spills at once with a clean cloth and cold water. Rotate the rug every few months so the pattern fades evenly in sunlight.
17. Reclaimed Wood Paneling

- Fit paneling on one wall only, to a height of 36 inches for wainscot or full height for a feature wall.
- Use planks 4 to 6 inches wide in mixed warm browns for a natural, varied look.
- Seal the wood with a clear matte finish so you can wipe it clean.
Reclaimed wood paneling brings the grain, knots and nail holes of old barn wood or salvaged floorboards into the dining room. In a 1970s room, a single panelled wall behind the table adds texture and warmth, and it makes white walls feel less stark. The wood works well with wool, leather and brass.
Buy the planks from a reclamation yard and check them for rot, insects and old nails before you fit them. Let the wood sit in the room for 48 hours so it adjusts to the humidity, then fix it to battens on the wall with a nail gun. Fill the gaps with a matching wood filler and sand it smooth.
18. Botanical Vintage Prints

- Hang prints in a grid of four, each 11 by 14 inches, with 2 inches between frames.
- Use the same dark wood frame for every print, so the group reads as one set.
- Pick prints in green, brown and cream, to match the warm 1970s palette.
Botanical prints were a 1970s favourite, often copied from old seed catalogues and herbals. A fern, a leafy branch or a wildflower, printed in green and brown on cream paper, adds a calm, natural note to a warm wood room. The prints work in a small grid or as a pair on either side of a mirror.
Frame the prints under glass to keep dust and cooking steam off the paper, and hang them out of direct sun. A set of four prints, each in an 11 by 14 inch frame, fills a wall space about 24 by 30 inches. Keep the frames level with a small spirit level before you mark the hooks.
19. Vintage Clock as Focal Point

- Choose a clock 24 to 30 inches across for a wall above a sideboard.
- Hang it so the centre sits 60 to 65 inches from the floor.
- Pick a wood or brass case with a cream face and clear black numerals.
A large wall clock was a practical centrepiece in a 1970s dining room, and it still fills a blank wall better than most decor. A round clock in dark wood, a square clock in brass, or a farmhouse style clock with a cream face all suit warm wood and wool. The clock gives the room a clear focal point and a useful job.
Check that the movement runs quietly before you hang it, and use a fresh battery or have a clockmaker service an old mechanical movement. Fix it to a stud with a screw hook, not a picture nail, because a large clock can weigh 10 pounds or more. Set the time, then check it again after a day.
20. Vintage-Inspired Pendant Lighting

- Hang one pendant 30 to 34 inches above the table, or three small pendants 24 inches apart.
- Choose hammered brass, milk glass or amber glass for a warm 1970s glow.
- Fit a dimmer so you can lower the light for evening meals.
Low pendant lights were a 1970s dining room signature. A single milk glass pendant, a hammered brass shade, or a cluster of three small amber glass pendants at slightly different heights gives a warm pool of light over the table. The low hang makes the table feel like the centre of the room.
Use warm bulbs at 2700 kelvin and keep the shade at least 30 inches above the table so no one bumps their head or blocks the light. If you hang three pendants over a table 72 inches long, space them 24 inches apart and centre the middle one over the table. An electrician should fit the wiring if the ceiling rose is old.
21. Antique Trunk as a Sideboard

- Pick a trunk 36 to 42 inches long and 18 to 20 inches deep, so it fits against a wall.
- Put a piece of glass or a thin wood board on top, so you have a flat serving surface.
- Store table linen and spare candles inside, where they stay clean and dry.
An old steamer trunk, with leather straps, wood slats and metal corners, makes an unexpected sideboard in a 1970s room. It holds table linen, candles and spare dishes inside, and its flat top holds a lamp, a plant and a stack of books. The trunk brings texture and a travel story to a room that might otherwise feel plain.
Check the trunk for a musty smell and air it outside for a day before you bring it in. Clean the inside with a damp cloth and a little white vinegar, then let it dry fully. If the lid does not stay open, fit a small lid stay, and keep heavy items at the bottom so the trunk does not tip.
22. Curated Flea Market Finds

- Keep a short list on your phone of the three things the room still needs.
- Buy one piece at a time, and live with it for a week before you buy the next.
- Ask the seller about the history of a piece, and note the price you paid for your records.
The 1970s were the decade of the flea market hunt, and a room built that way still feels the most personal. A quirky lamp, an old picture frame, a set of brass candlesticks found on different visits all add up to a room with a story. The hunt itself becomes part of how the room looks.
Go early to a flea market, when the best pieces are still there, and bring a tape measure so you can check a piece against your room size on the spot. Haggling is normal at many markets, so ask politely if the seller can do a little better on the price. Leave a piece behind if it does not fit your list, even if it is cheap.
FAQs About Vintage Dining Room Decor Ideas
1. How do I create a vintage look in my dining room?
Start with one or two old pieces, such as a wood table or a sideboard, then add secondhand chairs, vintage lighting and period fabrics. Keep the palette to three colours and let the old pieces lead, so the room looks collected rather than staged.
2. Where can I find good vintage dining room decor?
Estate sales, flea markets, antique shops and online vintage marketplaces are good sources. Family attics and inherited pieces also give you genuine items with a story, and they often cost nothing.
3. What color palette works best for a vintage dining room?
It depends on the era. Use black, white, brass and deep green for 1920s glamour, mint, rose and pale yellow for 1950s charm, and rust, brown and cream for 1970s warmth. Pick three colours and repeat them through the room.
4. How do I display vintage china without it looking cluttered?
Sort pieces by one shared colour, stack small plates on larger ones, and leave space on each shelf. Editing the display down to your favourite pieces keeps it looking curated rather than crowded.
5. Can I mix vintage and modern furniture in my dining room?
Yes. Pair an antique table or sideboard with simple modern chairs and plain lighting. Keep one shared colour or one shared material across the two styles, so the mix looks intentional.
6. What lighting works best for a vintage dining room?
Crystal chandeliers, brass candlesticks and milk glass pendants suit the style well. Warm bulbs at 2700 kelvin and a dimmer switch help recreate the softer light of earlier decades.
7. How do I make mismatched vintage chairs look intentional?
Keep one thing consistent across the set, such as a shared wood tone, a common paint colour or one fabric on every seat. Matching seat heights, 17 to 19 inches, also helps the set look planned.
8. What fabric patterns suit a vintage dining room?
Damask, toile and floral chintz all have roots in earlier dining room styling. Choose muted, slightly faded colours rather than bright, saturated versions, so the pattern looks aged and calm.
9. How can I add vintage charm without buying new furniture?
Swap in secondhand pieces, repaint a hutch or sideboard, add vintage style wallpaper on one wall, or display silverware and china you already own. Small changes often have as much impact as large purchases.
10. What wall decor works best in a vintage dining room?
Ornate mirrors, botanical prints, vintage clocks and oil paintings in carved or gilded frames all suit the style. Hang them at eye level, with the centre 57 to 60 inches from the floor, for the best effect.
Conclusion
A vintage dining room comes together slowly, one era at a time. Pick the decade that fits your home, start with a table or a sideboard, and add pieces that you will actually use. Save this list on Pinterest, note the sizes and colours that work in your room, and let the room grow with each market visit and each find.