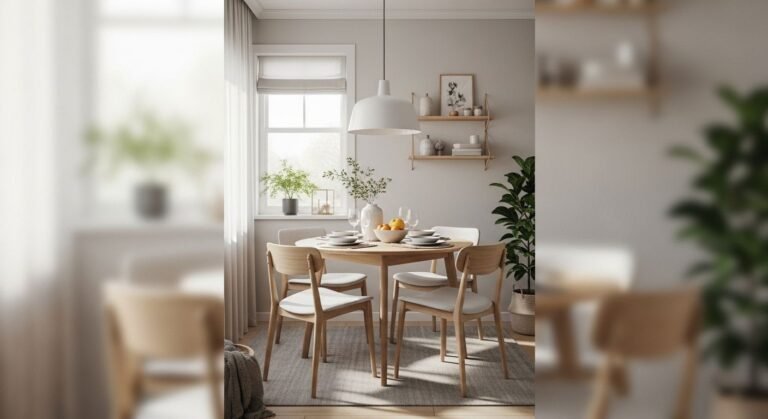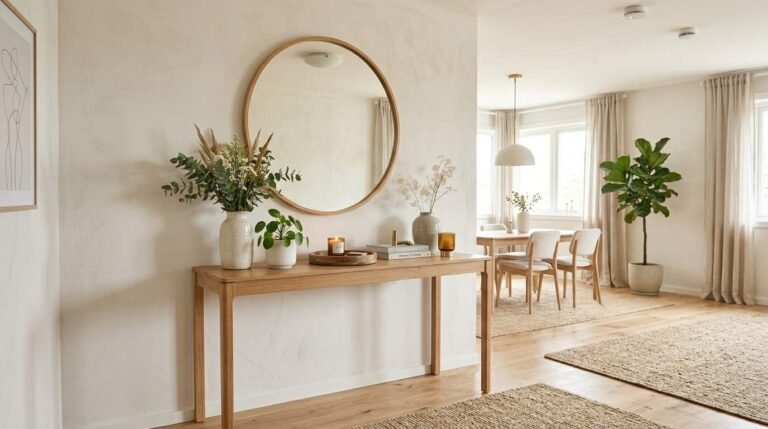
A dining room cabinet can hold your best dishes, hide the extras, and set the mood for the whole room, but only when you style it for the cabinet type you own. A glass-front cabinet shows everything, so the display has to earn the attention. A solid cabinet hides the contents, so the doors and the top do the work. A china cabinet is built for plates and glass, and a sideboard cabinet is built for serving. This guide to dining room cabinet decor follows those four cabinet types, glass-front cabinets, solid cabinets, china cabinets, and sideboard cabinets, with 24 ideas that use pieces you probably already own, with exact measurements, colors, and materials in every idea.
1. A Glass-Front China Cabinet Display
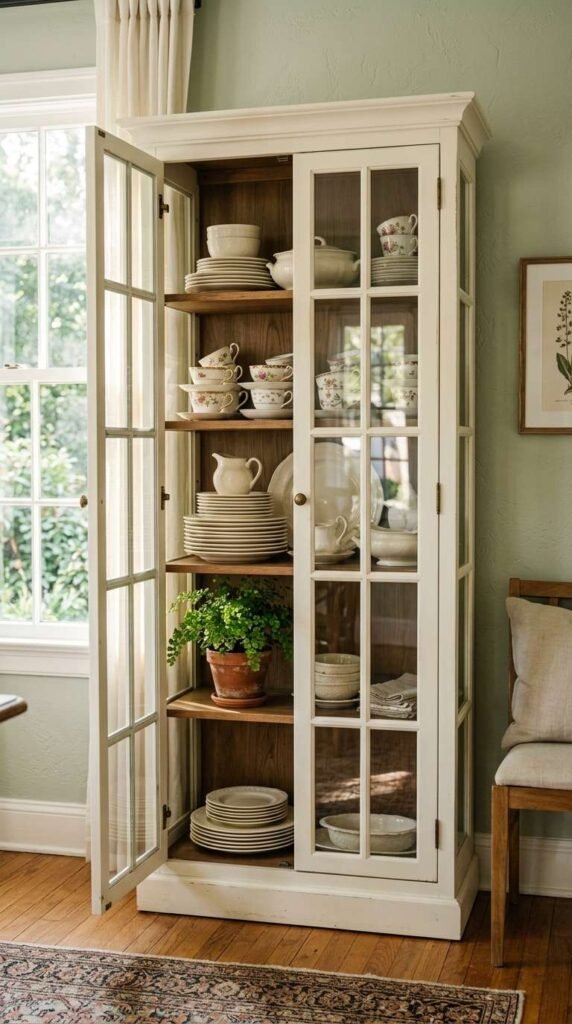
- Four 10.5 inch white dinner plates on plate stands, leaning against the back of the top glass-front shelf.
- A 6 inch blue and white ginger jar at the center of the glass-front cabinet, for a single spot of color.
- Six 9 inch wine glasses in two rows of three, with 1 inch between each glass, stems up.
- One warm white LED puck light, 2.5 inches wide, under the top shelf, about 2700K, to make the glass glow.
- Three inches of clear space at each end of the shelf, so the display reads as framed, not packed.
A glass-front china cabinet protects your best dishes from dust while keeping them on view, so the top shelf is the right home for china you use only on holidays. Stand plates upright at the back and set shorter glassware in front, so every layer shows through the pane. Blue and white china, amber glass, and a small brass tray read well through clean glass, and the color looks a touch bolder than it does on an open shelf.
Clean the glass with one part white vinegar to three parts water, and wipe the inside of the door each month so fingerprints never build up. Keep the shelves from filling edge to edge, since a glass front already adds a frame and a little empty space at the sides makes the whole cabinet feel calmer. Dust the plates every two weeks, as a glass-front cabinet shows dust on white porcelain faster than a solid door cabinet does.
2. Open Shelving Hutch Styling
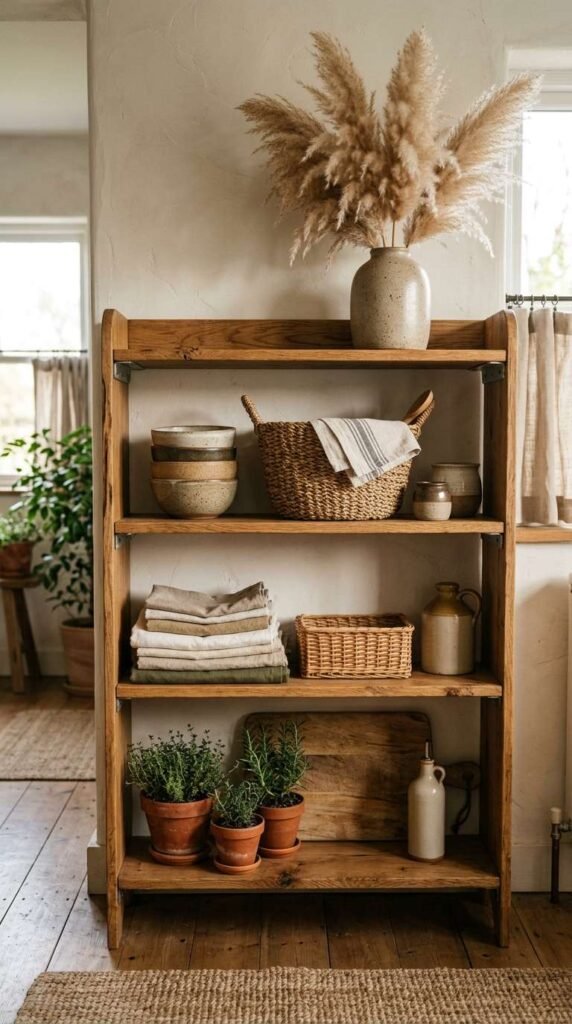
- Three 10 inch dinner plates upright on the open hutch shelf, spaced 2 inches apart.
- A 7 inch white ceramic pitcher at one end of the shelf, to break the straight line of plates.
- Two 8 inch salad plates stacked flat beside a small stack of cream bowls.
- A 5 inch clear glass vase with a single green stem at the center of the shelf.
- Four inches of open space above the tallest plate, so the open shelf never looks crowded.
An open shelving hutch has no doors to hide behind, so each shelf needs a clear job. The top shelf carries your best plates, the middle shelf holds everyday dishes, and the lowest shelf takes the pieces you reach for at every meal. White stoneware, pale blue glass, and light oak sit well together on open shelves, and a single green stem keeps the display from looking like a shop window.
Use the top shelf for display only, and keep everyday plates one shelf lower where hands can reach them without a step stool. That split keeps the pretty layer intact while the working layer stays practical. Dust an open hutch once a week, since open shelving collects dust faster than a closed cabinet, and a quick wipe with a damp cotton cloth keeps white plates bright.
3. Layered Plate Stacking
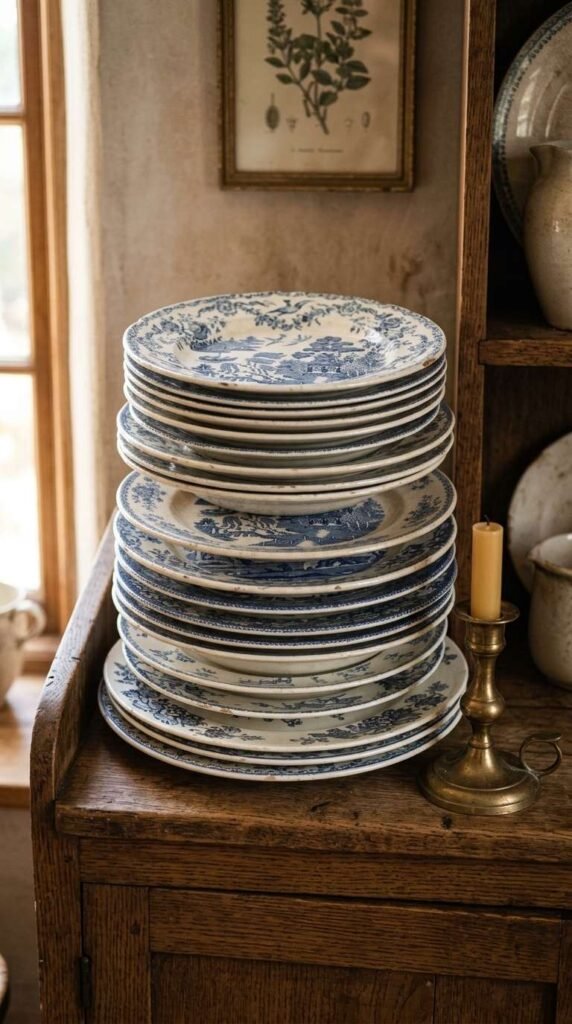
- One stack per group: a 10.5 inch dinner plate at the base, an 8 inch salad plate, and a 5 inch bowl on top.
- Three or four pieces per stack, so it stays steady when the china cabinet door opens or closes.
- A 6 inch wooden riser behind the stacks, with a row of small plates on it for a second height level.
- Two inches between stacks, so you can lift one plate without knocking the next stack over.
- Plates with the same rim color, such as a thin blue line, to tie mismatched stacks together.
Stacking plates by size turns a flat china cabinet shelf into a display with real depth, and it uses far less shelf space than laying each plate out in a row. A short stack of three reads as one neat unit, so the eye moves across the shelf instead of stopping at a jumble of edges. Keep the heaviest plates at the bottom and the lightest on top, and check that each stack sits flat before you walk away.
Consistency matters more than matching sets here. Stacks built around one shared detail, such as a blue rim or a cream glaze, hold together visually even when the plates come from different makers. Set a small cake stand, about 8 inches wide, beside one stack to add another level of height, and the whole shelf gains a rhythm that a single flat row of plates can never give.
4. Statement Lighting Inside the Cabinet
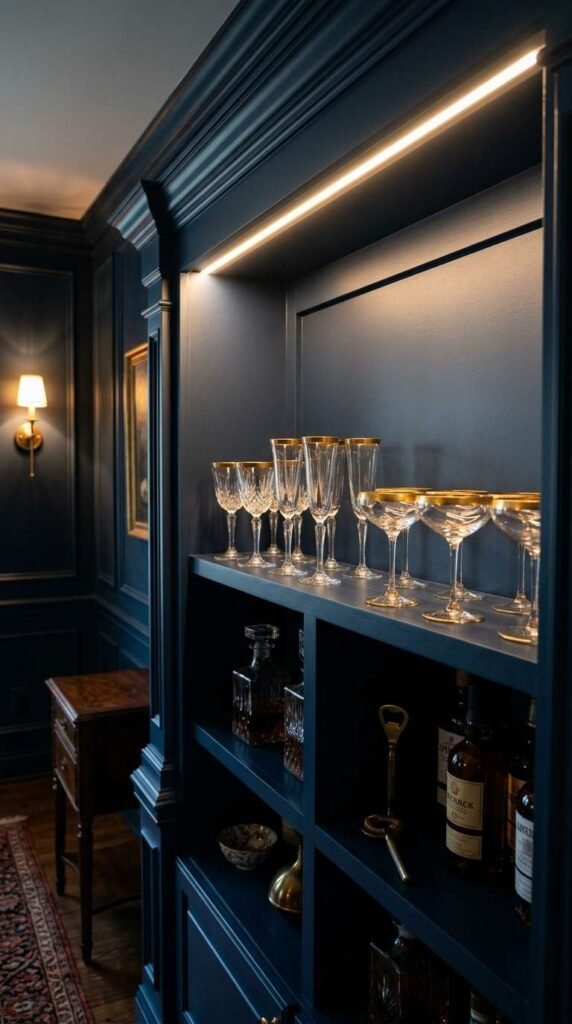
- A 24 inch warm white LED strip under the front edge of each glass-front cabinet shelf.
- Bulbs at 2700K, since warm white light flatters white plates and clear glass far better than cool blue light.
- A battery pack with a remote dimmer, when no outlet sits behind the cabinet, with spare AA batteries in a drawer.
- One LED puck light, 2.5 inches wide, angled down at a mirror or a silver tray so light bounces across the shelves.
- A night test before you fix the strips in place, moving them 1 inch back if they glare at the table.
Hidden light changes a glass-front cabinet most, because it lifts the dishes out of shadow once the sun goes down. Thin LED strips tuck under the front edge of each shelf and wash light down over plates and glasses, so even plain white dishes look special at dinner. Most strips run on a battery pack or a small plug in adapter, so no electrician or new wiring is needed.
Warm white light, around 2700K, suits a dining room far better than cool white, which can make wood look gray and glass look harsh. A remote dimmer lets you drop the glow low for a quiet dinner and raise it when guests arrive. Keep the strips along the front edge rather than the back, so the light falls on the shelf surface instead of glowing behind the dishes.
5. Mixing Vintage and Modern Dishware
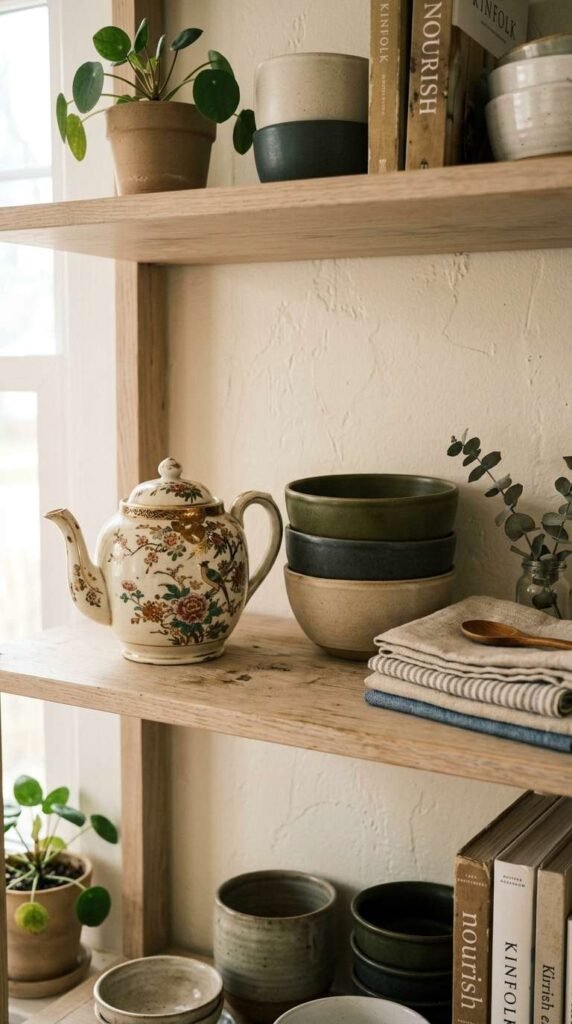
- One vintage gravy boat, about 8 inches long, on the china cabinet shelf beside a row of new white plates.
- About half the shelf old and half new, so neither style takes over the china cabinet display.
- Delicate antique pieces on the upper shelf, out of daily reach, and sturdy modern dishes lower down.
- One 7 inch antique teacup and saucer as the single old piece on a shelf of plain modern bowls.
- One color, such as cream or soft blue, repeated across both old and new pieces to tie the shelf together.
A china cabinet shelf filled only with matching new dishware can feel flat, while a shelf of only antiques can feel untouchable. Mixing the two gives the display depth: one vintage gravy boat or an antique teacup beside clean modern plates adds contrast and a story. Use pieces you already own, such as an inherited cup or a thrift store find, so the mix costs nothing extra.
Balance is what makes the mix look planned instead of random. Keep about half the shelf modern and half older, and repeat one color across both groups so the eye sees a single shelf, not two separate collections. Put fragile antiques higher up and sturdy modern dishes where hands reach them daily, so the pretty pieces stay safe and the practical ones stay useful.
6. Color-Coordinated Dishware Display
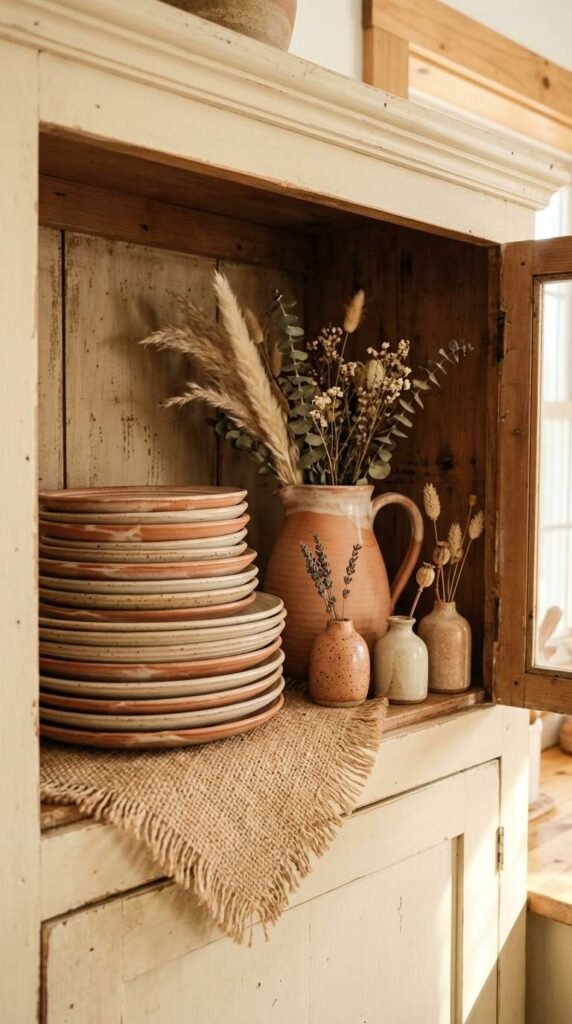
- Two main colors, such as navy blue and cream, plus one accent color, such as soft gold, for the whole china cabinet.
- All blue pieces on the left half of each shelf, and all cream pieces on the right half.
- One 6 inch gold candle holder at the center of the shelf as the single accent piece.
- Plates arranged from lightest to darkest, left to right, for a soft gradient effect.
- The same two colors on the table linens as in the cabinet, so the room and the cabinet read as one plan.
Sorting a china cabinet by color is one of the fastest ways to make it look polished, and it costs nothing. Group every blue item together and every cream piece together, and the eye moves smoothly across the shelf instead of jumping between clashing patterns. Mismatched plates stop looking random when one color repeats across them, so even dishes from different sets read as a planned display. The same color first rule also guides formal dining room decor, where one repeated shade keeps a whole room from looking scattered.
Keep the palette to two main colors plus one accent, since a wider mix starts to look busy. A single colored glass pitcher or a ceramic vase in the accent color adds just enough contrast without breaking the calm. Arrange colors lightest to darkest across the shelf for a gentle gradient, and match the palette to the room: navy and cream shelves sit well in a room with navy chairs or cream curtains.
7. Woven Basket Storage Accents
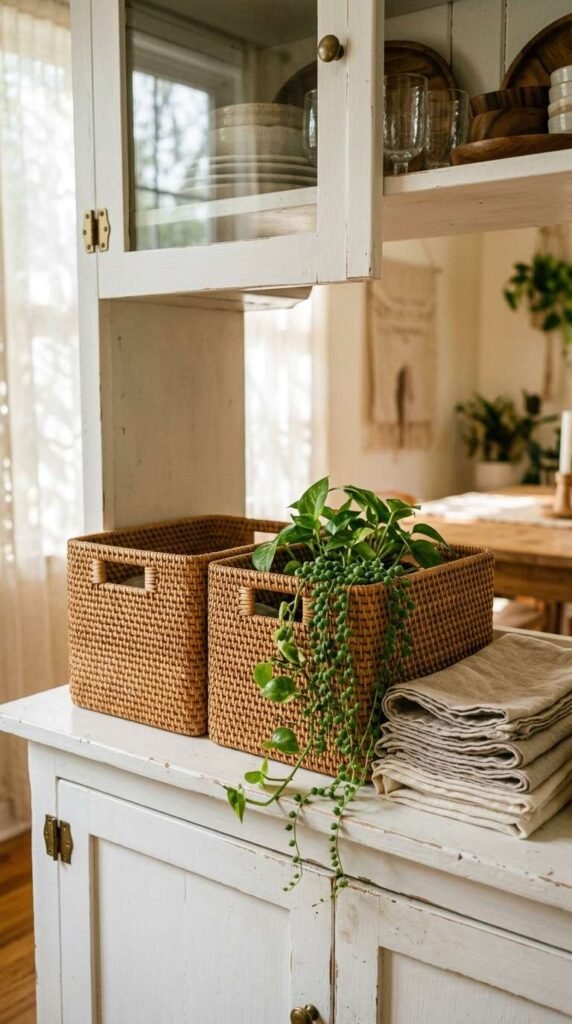
- Two 12 inch wide seagrass baskets side by side in the solid cabinet, one for placemats and one for cloth napkins.
- Baskets 1 inch narrower than the shelf, measured first, so they slide in and out with ease.
- Rolled linen napkins inside the baskets, since rolled napkins take less space and stay wrinkle free.
- Small cotton tags on the basket handles, labeled in plain words such as napkins or candles.
- Baskets on the lowest cabinet shelf, where natural fiber texture softens the wood without hiding the dishes above.
A solid cabinet hides what is inside, so the baskets carry both the storage and the style. Seagrass and rattan add warm, natural texture to a cabinet that is otherwise all hard ceramic and glass, and they keep table linens, placemats, and extra silverware in one tidy spot. A woven basket also softens the hard lines of a solid wood cabinet, and a simple home decor vases display on the shelf above keeps the eye moving between the textures.
Stick to two or three baskets in the solid cabinet, in the same fiber and color, so the storage reads as a set rather than a jumble. Label each one with a simple tag, and store the pieces you use most often at the front. A basket costs little, hides a lot, and keeps the display shelves above it free for the pieces you actually want to show.
8. Botanical Greenery on Top of the Cabinet
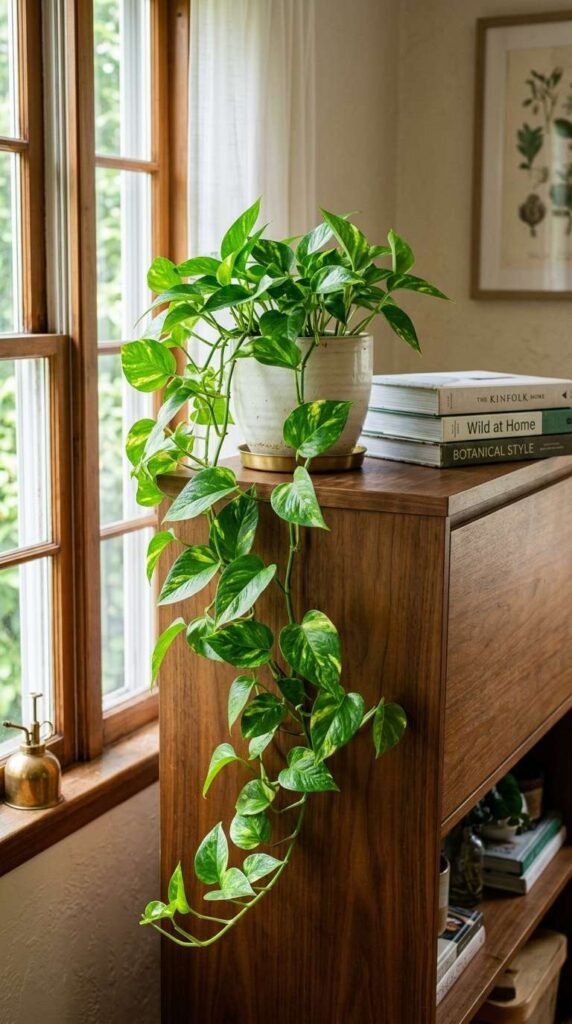
- One 6 inch terracotta pot with a small pothos on the top of the sideboard cabinet, off center, with a 5 inch saucer under it.
- A 14 inch eucalyptus stem in a 5 inch clear bud vase at the end of the cabinet top.
- A faux stem when the cabinet top gets less than 2 hours of daylight, since real plants fade fast in the dark.
- Greenery in one spot only, so the plant softens the ceramics below without hiding the cabinet.
- Trailing stems trimmed to 12 inches, so they do not drip water onto the cabinet top or tangle with the dishes.
A small plant on top of a sideboard cabinet breaks up a display that is otherwise all hard ceramic and glass. One trailing pothos, a single eucalyptus branch, or a small dried arrangement adds a soft shape and a touch of green that plates and bowls cannot give. Place the greenery slightly off center, since a plant set dead center on a cabinet top tends to look staged and stiff.
Real plants need a saucer under the pot to protect the cabinet finish from water, which matters most on an older or antique sideboard. When light above the cabinet is limited, a well made faux stem holds its color with no care at all. Swap the stem with the season if you like: fresh green in spring, dried stems in fall, and a small pine sprig in December.
9. Antique Mirror Backing for Dining Room Cabinet Decor
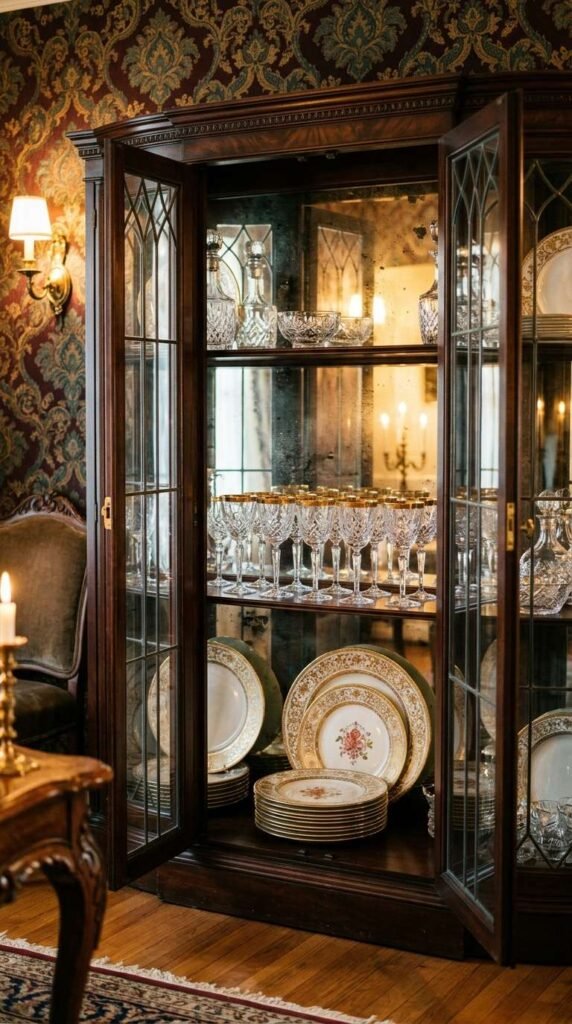
- One mirror cut to the inside back panel of the glass-front section, 0.5 inch smaller on every side so it fits flat.
- Antique style mirror glass with a soft smoky finish, since it hides fingerprints far better than a clear new mirror.
- White plates and clear glass in front of the mirror, since pale pieces double nicely in the reflection.
- Peel and stick mirror tiles, each 12 inches square, when you rent or want a change you can remove later.
- A warm 2700K light paired with the mirrored back, so the reflection feels warm, not cold or clinical.
A mirror on the back panel of a glass-front cabinet makes the whole interior look deeper and brighter. Light bounces off the reflective surface and multiplies whatever sits in front of it, so even a modestly filled shelf looks fuller. Antique style mirror glass suits this spot best, since its soft, slightly smoky finish hides fingerprints and dust better than a bright, perfectly clear mirror.
Most hardware stores cut mirror to size for a modest fee, so measure the panel first and order the mirror half an inch smaller on each side. Peel and stick tiles work well for renters or anyone who wants a change that comes off later. Pair the mirror with warm lighting, since cool bulbs can make the reflections feel harsh instead of warm and inviting.
10. Brass Hardware Upgrade
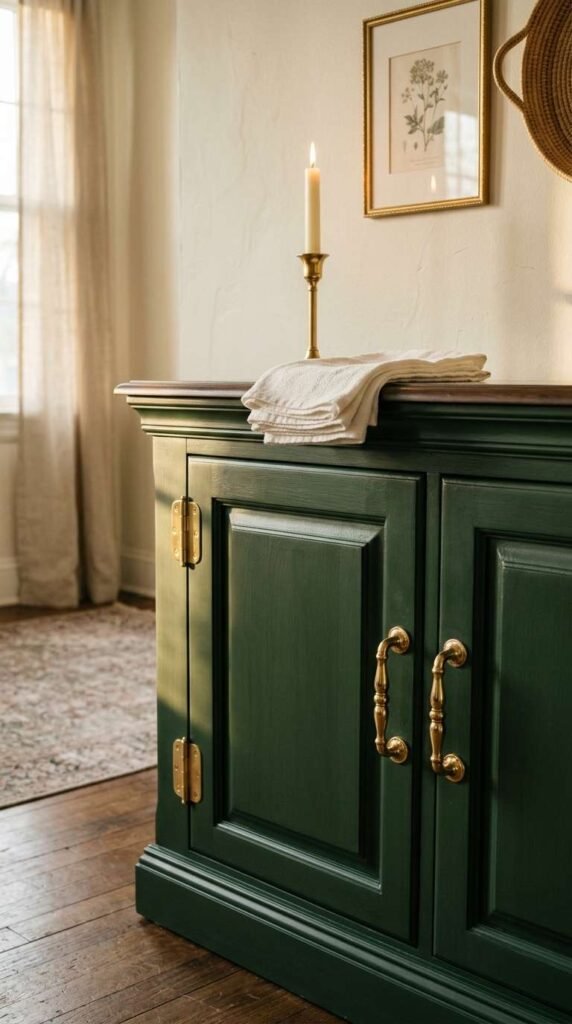
- Two 1.5 inch brushed brass knobs per solid cabinet door, swapped in about twenty minutes with a screwdriver.
- Brushed or satin brass for a soft modern feel, and polished brass for a more formal dining room.
- One metal finish repeated on the cabinet, the sideboard pulls, and the light fixture, so the room holds together.
- New screws matched to the door thickness, about 1 inch long for most solid cabinet doors.
- The old knobs kept in a labeled bag, so you can put them back if you change your mind later.
Swapping the knobs and pulls on a solid cabinet is the smallest change with the biggest visual return. Brushed brass lifts a tired wood cabinet in about twenty minutes, with no paint, no new furniture, and no tools beyond a screwdriver. The warm metal suits oak, walnut, navy paint, and deep green paint, which covers most dining room cabinets.
Finish matters as much as color. Brushed or satin brass feels modern and soft, while polished brass feels more formal and suits a traditional room. Measure the screw spacing on your current pulls before you buy, since cabinet pulls are sold in set spacings such as 3 inches or 3.75 inches, and a mismatched pull will not fit the existing holes. Keep the old hardware in a labeled bag in a drawer.
11. Layered Trays and Platters
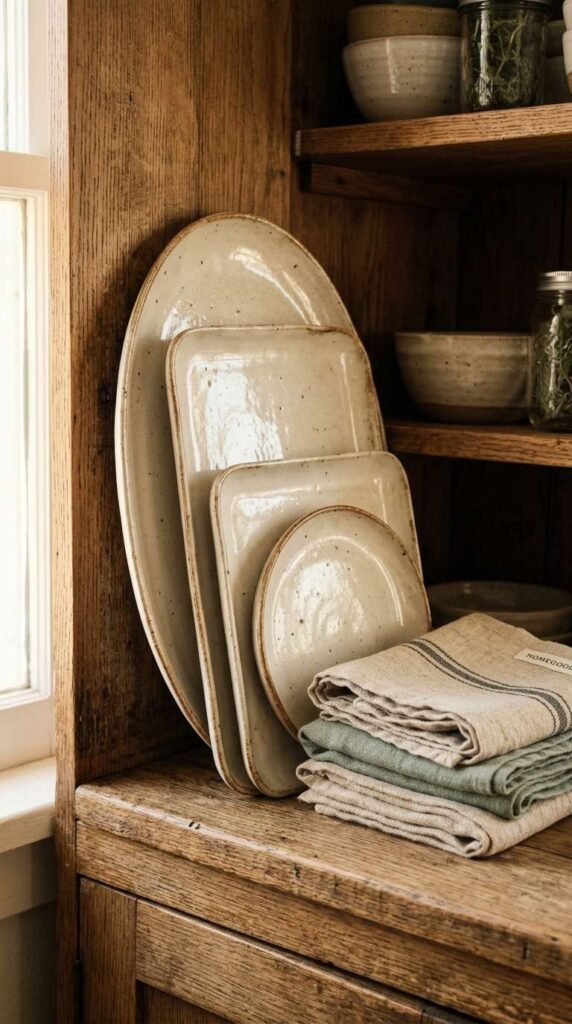
- One 14 inch wood tray as the base on the china cabinet shelf, with a 10 inch marble tray on top of it.
- A 12 inch round platter stood upright at the back of the shelf, leaning on a plate stand.
- Salt and pepper shakers, about 4 inches tall, grouped on the top tray so small items stay in one place.
- Two materials only on the shelf, such as wood and marble, so the layers read as a set, not a pile.
- One tray left empty, so the shelf has breathing room and the layers do not cover every inch.
A tray groups small items into one tidy unit, which makes a china cabinet shelf look organized without adding new furniture. A wood tray under a marble tray, or a metal tray over a linen mat, adds height and a second material to a shelf that would otherwise be all ceramic. Trays also make cleaning quick, since you lift one tray instead of moving a dozen small pieces.
Layering works best with a simple pattern: start with the largest platter as the base, add a smaller tray on top, then place the smallest objects on the upper tray. Keep the materials to two per shelf, such as wood and marble or metal and glass, so the layers stay calm. Leave one tray partly empty, since a tray filled to the edges looks like storage rather than styling.
12. Cabinet as a Bar Cart Alternative
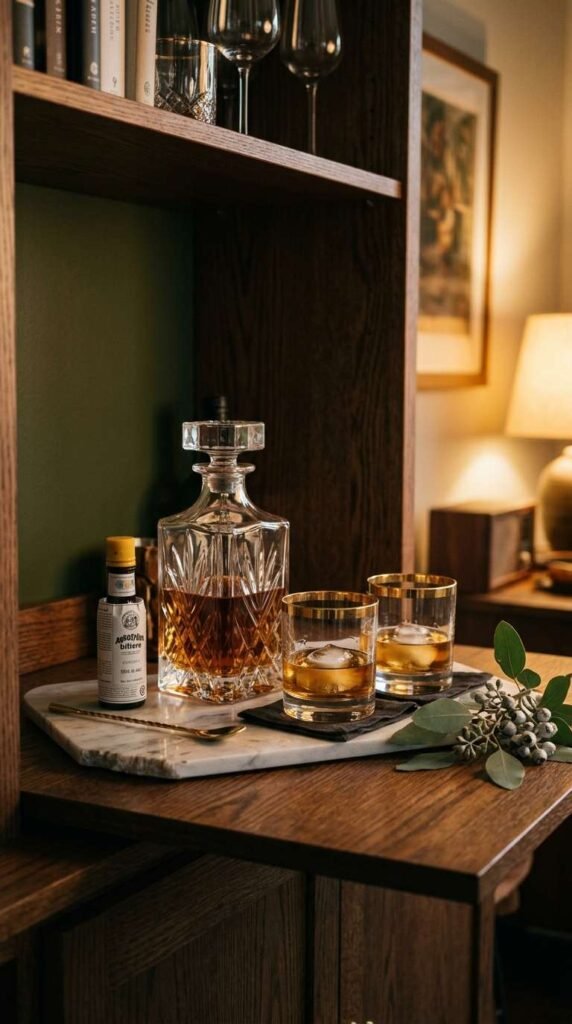
- One sideboard cabinet shelf given to the bar, with a 12 inch by 9 inch wood tray holding a shaker, a jigger, and a small spoon.
- Heavy bottles on the lower shelf of the sideboard cabinet, and light glasses on the shelf above them.
- Six 9 inch wine glasses in a row, with 1 inch between them, at the back of the bar shelf.
- A 5 inch white bowl of lemons and a stack of 4 inch cocktail napkins beside the tray.
- One 10 inch pitcher of water on the same shelf, so guests who skip alcohol still have something to pour.
A sideboard cabinet makes a natural bar station, since bottles and glasses stay close to the dining table and behind closed doors when the party ends. Give one shelf or one side of the cabinet to the drinks setup, and the cabinet takes on a second job without needing a separate bar cart on the floor. This works well in smaller dining rooms, where every extra piece of furniture has to earn its space.
Keep the bar contained on a tray, so the shaker, jigger, and garnishes stay in one spot instead of spreading across the shelf. Store heavy bottles low and light glassware above, which makes serving smoother when guests arrive. A small bowl of citrus and a stack of napkins finish the setup without taking much space at all.
Stocking a Cabinet Bar Nook
Start with the basics: one bottle you enjoy, a bottle of sparkling water or wine, and a small set of glasses you like to drink from. Add a shaker, a jigger, and a bar spoon, and keep the garnishes, such as lemons and limes, in a 5 inch bowl on the tray. Keep the nook to one shelf, and store extra bottles in the lower cabinet, so the bar stays tidy and the cabinet still holds your dishes.
13. Symmetrical Cabinet Styling
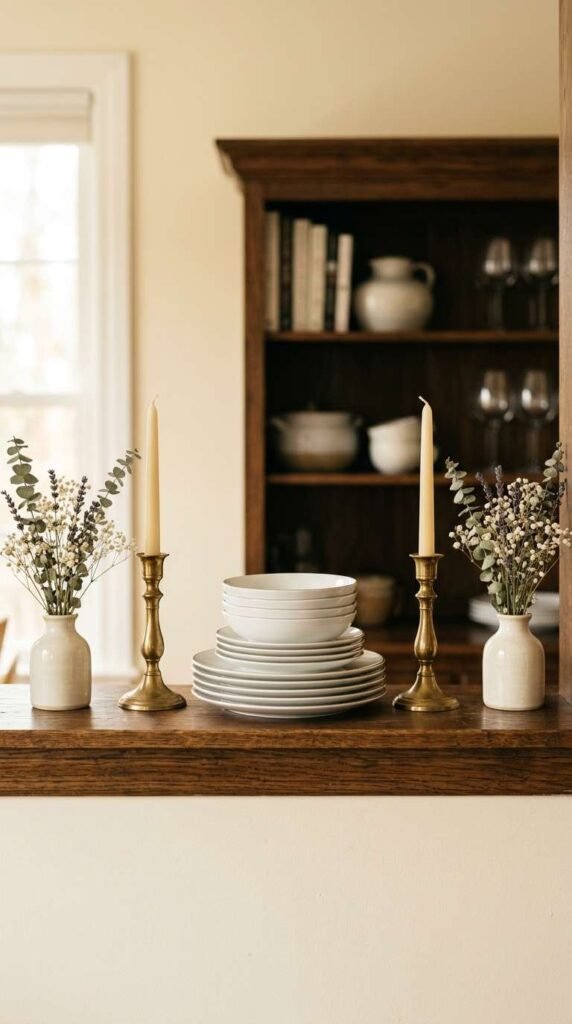
- One focal piece at the center of each solid cabinet shelf, such as a 12 inch platter or a 10 inch vase.
- Mirrored pairs on both sides of the focal piece, such as two 6 inch candle holders, one left and one right.
- Two stacks of plates, each three high, at the same height on both ends of the shelf.
- Matching colors on both sides, such as white plates left and white plates right, with one blue piece in the middle.
- One small difference between the sides, such as a plant on the left only, so the symmetry feels calm, not stiff.
Symmetry on a solid cabinet shelf gives the whole dining room a sense of order. A focal piece at the center, with a mirrored pair on each side, reads as deliberate from the moment guests sit down. The trick is to keep the two sides near twins rather than exact twins, so the shelf looks styled by hand instead of copied by a machine.
Start with the center piece, then add one matching pair, then check the shelf from the table before you add anything else. Two stacks of plates at the same height on both ends, with a vase or a platter in the middle, is the classic layout, and it works on almost any solid cabinet. Leave one small difference, such as a single plant on the left side only, so the symmetry stays relaxed.
14. Seasonal Cabinet Decor Rotation
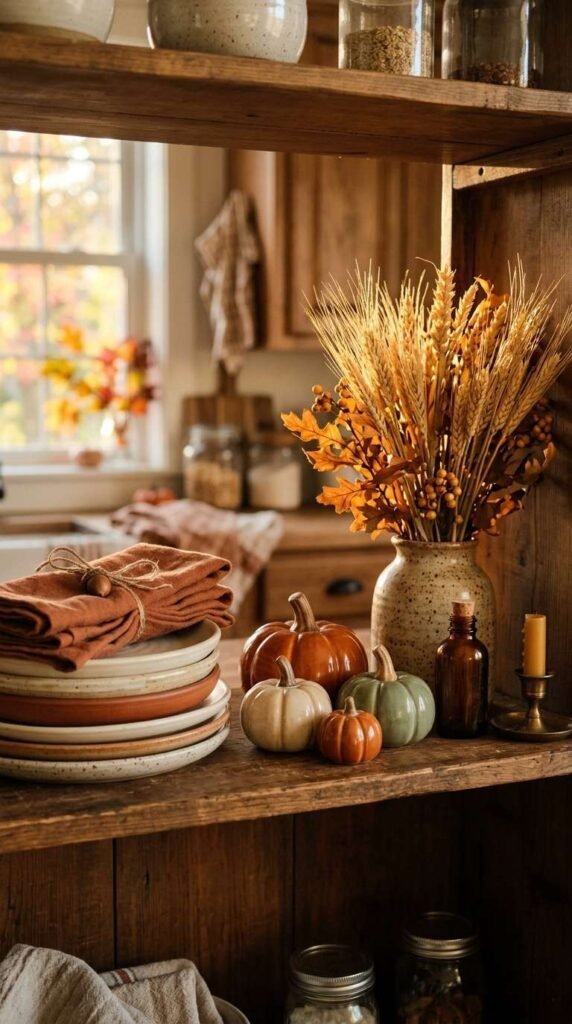
- One sideboard cabinet shelf rotated each season, with the other shelves left exactly as they are.
- Two 6 inch ceramic pumpkins in burnt orange in fall, beside a stack of cream plates.
- A 12 inch pine garland along the front edge of the shelf in December, with a 4 inch red candle.
- A 10 inch glass vase with three white tulips in spring, with the pumpkins moved to a storage bin.
- Every seasonal piece in one labeled 14 inch storage bin, so each swap takes under 20 minutes.
A seasonal rotation keeps a sideboard cabinet feeling current without a full restyle every few months. Change two or three pieces on one shelf only, and the whole cabinet feels new while your everyday dishes stay in place. Store the off season pieces together in one labeled bin, so the swap takes minutes instead of turning into a weekend project.
One seasonal candle or a sprig of holly tucked among white plates does more than a shelf full of themed objects. Keep a small budget in mind and reuse the same pieces each year where that is possible, since a single 6 inch pumpkin or a bunch of fresh tulips costs far less than a new set of dishes. Swap one piece at a time and step back to look, so the shelf never ends up overfilled.
15. Formal Dining Room Decor Pairing
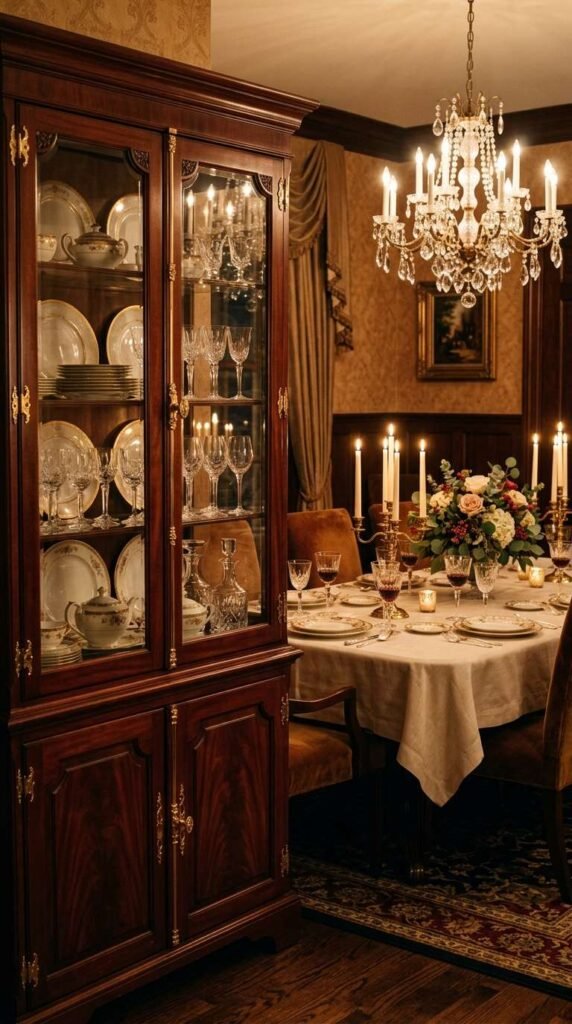
- Crystal stemware, 9 inches tall, in the glass-front cabinet, with silver serving pieces on the shelf below.
- White linen napkins, folded to 8 inches, stacked in the sideboard cabinet drawer beside the crystal.
- One silver tray, 12 inches by 9 inches, as the base for a 7 inch decanter and two small glasses.
- Candles in pairs, 8 inches and 6 inches tall, in matching silver holders on the top shelf.
- One color only for the formal set, such as white and silver, with no bright color in the cabinet.
A formal dining room asks the glass-front cabinet to look its most polished, with crystal, silver, and white linen doing the work. Stemware lined up by height, a silver tray under the decanter, and candles in matched pairs give the cabinet a quiet, dressy feel. Keep the palette to white and silver, since a single bright color can break the formal mood in one shelf.
Use the glass-front cabinet for the pieces guests see first, and hide the everyday items in the sideboard cabinet below. Polish the silver once every three months with a gentle silver polish, and wash crystal by hand in lukewarm water. A formal cabinet does not need many pieces: a tidy set of stemware, one tray, and a pair of candles can carry the whole look.
16. Corner Cabinet Nook Styling
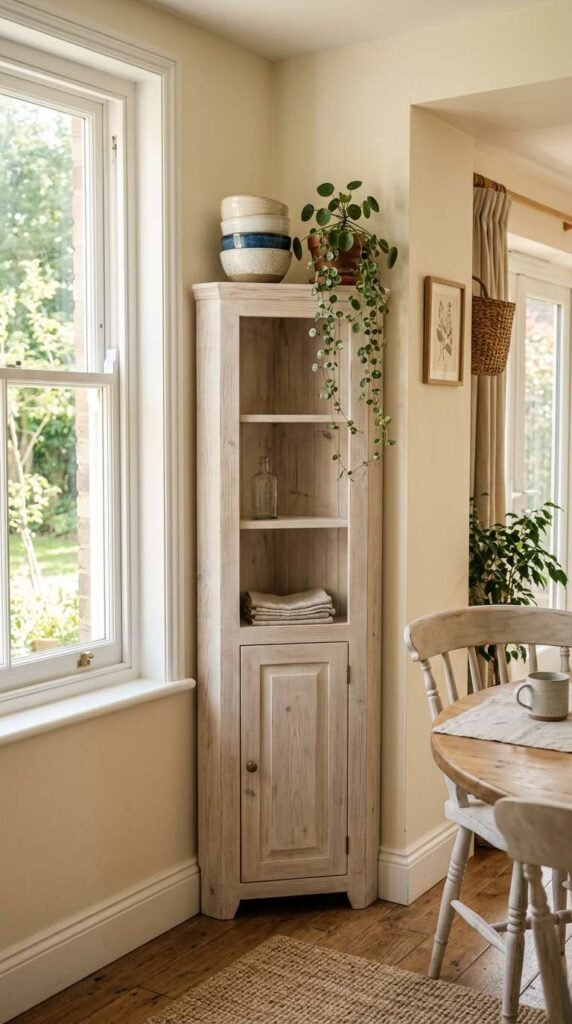
- One corner sideboard cabinet, about 30 inches wide, set flat against both walls of the dining room corner.
- Heavy pieces on the lowest shelf, such as a 10 inch serving bowl, and light pieces on the top shelf.
- A 6 inch potted plant on the top of the cabinet, with a 5 inch saucer under it, to soften the corner.
- One group of objects per shelf, with 2 inches of open space on one side of every shelf.
- A small angle bracket fixing the top of the cabinet to the wall, so the piece cannot tip forward.
A corner cabinet nook turns a spot that usually holds nothing into useful storage. The corner shape fits flat against two walls, so the cabinet adds display space without taking over the room. Heavy pieces belong on the lowest shelves and light pieces on top, which keeps the piece steady and the display easy to read from the table.
Style each shelf with one kind of object and give each shelf a different role, such as a small display, a utility shelf for placemats, or a plant stand at the top. Keeping objects few and far between will make the whole piece feel lighter than a tower of dishes. Anchor the top to the wall with a hidden bracket when the floor is uneven, since a tall corner cabinet can wobble if it is not fixed.
17. Painted Cabinet Color Pop
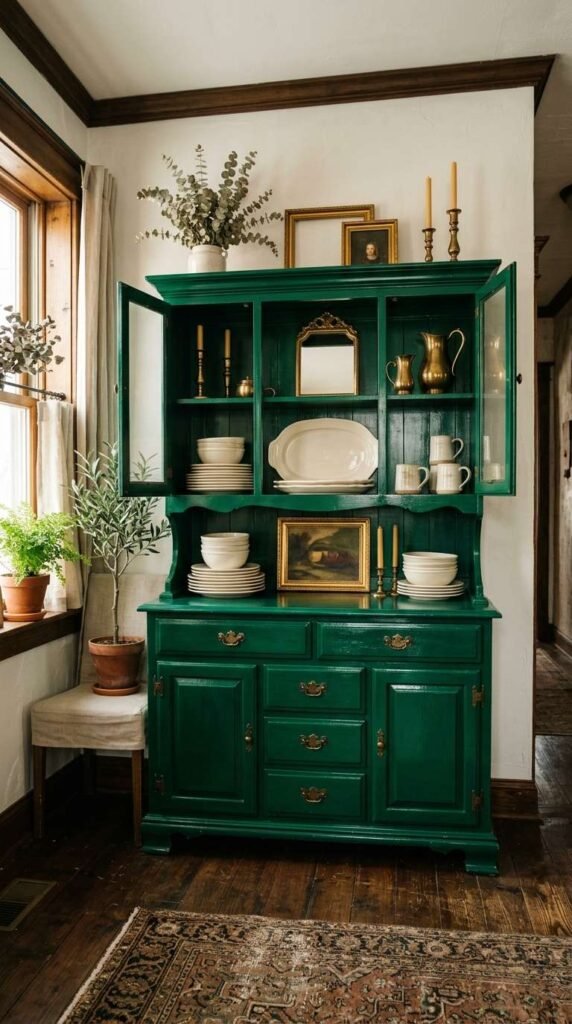
- Sage green satin paint on a solid cabinet, with white plates and clear glass on the shelves inside.
- Sanding with 120 grit sandpaper, then a tack cloth wipe, before one coat of bonding primer.
- Two thin coats of paint with a 2 inch brush, with 2 hours of drying time between coats.
- New 1.5 inch matte black round knobs to finish the solid cabinet doors after the paint dries.
- White and cream dishes on the shelves, since pale dishes stand out best against a colored cabinet.
A painted solid cabinet changes the whole dining room, because the cabinet is often the largest piece of furniture in it. Sage green, deep navy, and soft dusty rose all work, and a satin finish wipes clean when plates slide across it. Prep is what makes the paint last: clean the wood, sand lightly so primer grips, and use a bonding primer over any glossy old finish before you add color.
Let each coat dry fully before you put dishes back, and wait 24 hours before you load the shelves with heavy plates. White and cream dishes look best against a painted cabinet, since the contrast is clear without being loud. New hardware, such as matte black knobs, costs little and makes the whole makeover look finished rather than half done.
18. Cookbook and Linen Storage
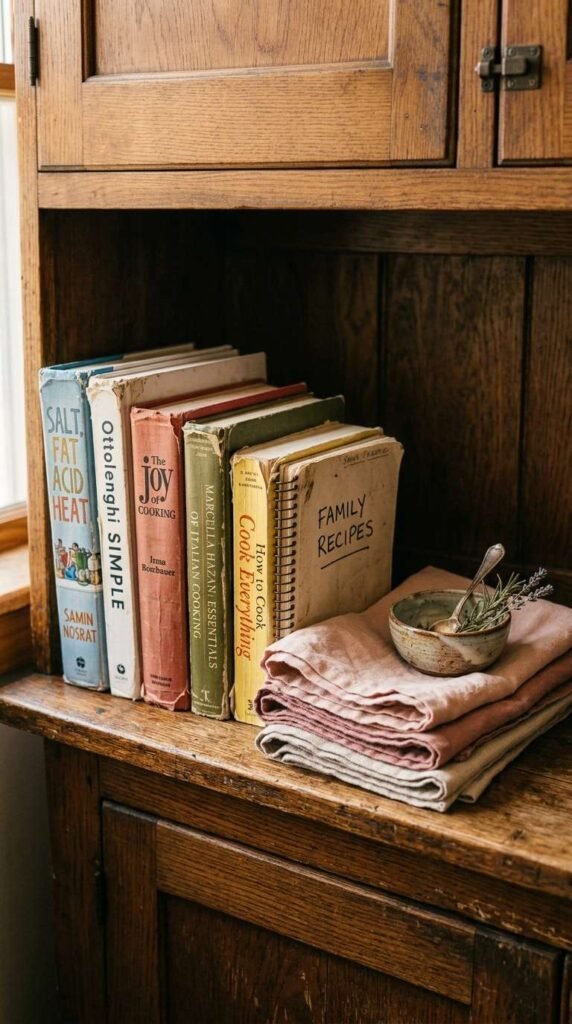
- Four cookbooks standing upright on the sideboard cabinet shelf, tallest at 11 inches on the left and shortest at 8 inches on the right.
- One 5 inch brass bookend holding the row up, with 2 inches of space after the last book.
- Two cookbooks stacked flat, with a 4 inch white candle on the top book.
- Books grouped by spine color, such as cream and sage green, so the cabinet shelf looks tidy instead of busy.
- The three cookbooks you open most on this shelf, and the rest in the kitchen, so the cabinet never overflows.
A small row of cookbooks gives a sideboard cabinet shelf height and texture that plates alone cannot provide. Standing books upright with a brass bookend, or stacking two flat with a candle on top, adds a visual break between the dishware above and the storage below. This works best when the dining room sits close to the kitchen, since the books stay useful rather than turning into props nobody opens.
Sort the books by size or spine color so the row looks tidy instead of random. Lean one large book flat against the back panel, then stack two smaller ones in front of it for a sense of depth. A small potted herb beside the stack adds a bit of green, and rotating which books sit out every few months keeps the shelf feeling current.
19. Framed Art Leaning Against the Cabinet
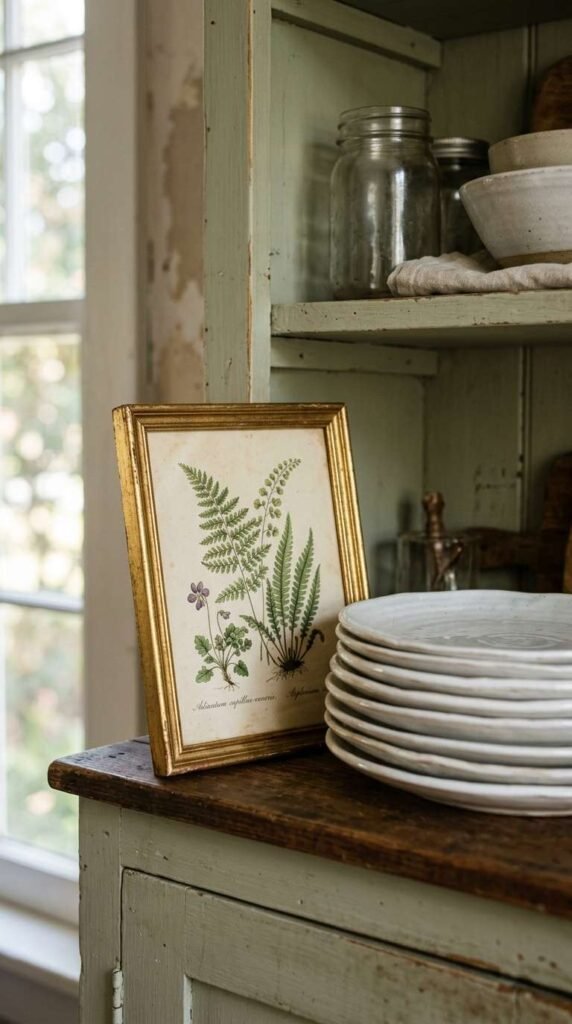
- One 16 inch by 20 inch framed print leaned against the wall on the sideboard cabinet top, with a 2 inch lip behind it.
- A smaller 8 inch by 10 inch frame overlapped in front of it, with 4 inches of the back frame showing on each side.
- One 1 inch wide museum putty strip anchoring the large frame, so it cannot slip forward.
- A 6 inch vase in front of the smaller frame, so the cabinet top has art at the back and an object at the front.
- The same frame color, black or natural wood, across both frames, so the look stays collected.
Leaning artwork on a sideboard cabinet top is faster to change than hanging it, and layering two frames gives a gallery feel without new nail holes. A 16 inch by 20 inch framed print at the back, a smaller 8 inch frame in front, and a vase in front of both reads as planned layering. Use the same frame color, black or natural wood, across both frames so the look stays collected.
Overlap the frames by about 40 percent, so the back frame keeps enough of its image visible. Choose two or three frames at most for one cabinet top, and set a book or a small box at the front for an extra layer of height. Swap a frame after each season to keep the top fresh, since leaning art can be changed in under a minute with no tools.
20. Candle and Candlestick Display
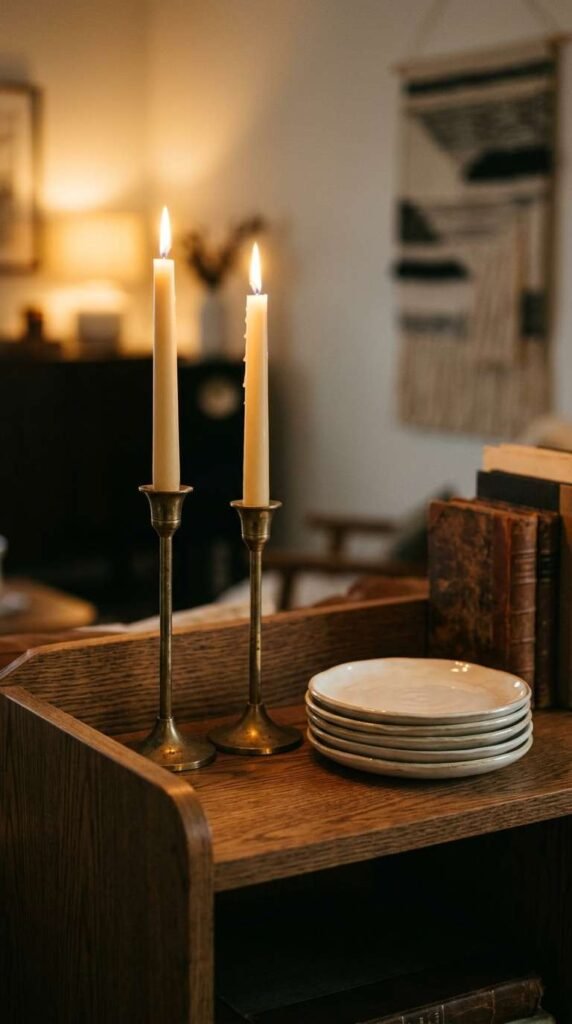
- Three pillar candles on the sideboard cabinet top: one 8 inch, one 6 inch, and one 4 inch tall, in the same ivory color.
- Each candle on a 5 inch glass tray, so melted wax never reaches the wood cabinet below.
- Candles at least 12 inches below any shelf above, and 3 inches away from books or paper.
- Two 10 inch silver candlesticks on the cabinet shelf, spaced 6 inches apart, with a 12 inch silver tray between them.
- LED flameless candles, 4 inches tall, on a high cabinet shelf where a real flame is hard to reach safely.
Candles on a sideboard cabinet top add a warm glow that makes the dining room feel inviting at night. A group of three pillar candles in the same color, with heights stepping from 8 inches down to 4 inches, gives the cabinet a soft, low light that pairs well with plates and books. Place each candle on a glass tray or a small plate to catch wax and protect the wood.
Safety comes first with real flames on a cabinet. Keep candles at least 12 inches below any shelf above and 3 inches away from books and paper, and never leave them burning when the room is empty. Battery candles give the same warm look on a high shelf where a real flame is hard to reach, and a remote timer turns them off after two or four hours.
21. Wallpaper Backing Inside the Cabinet
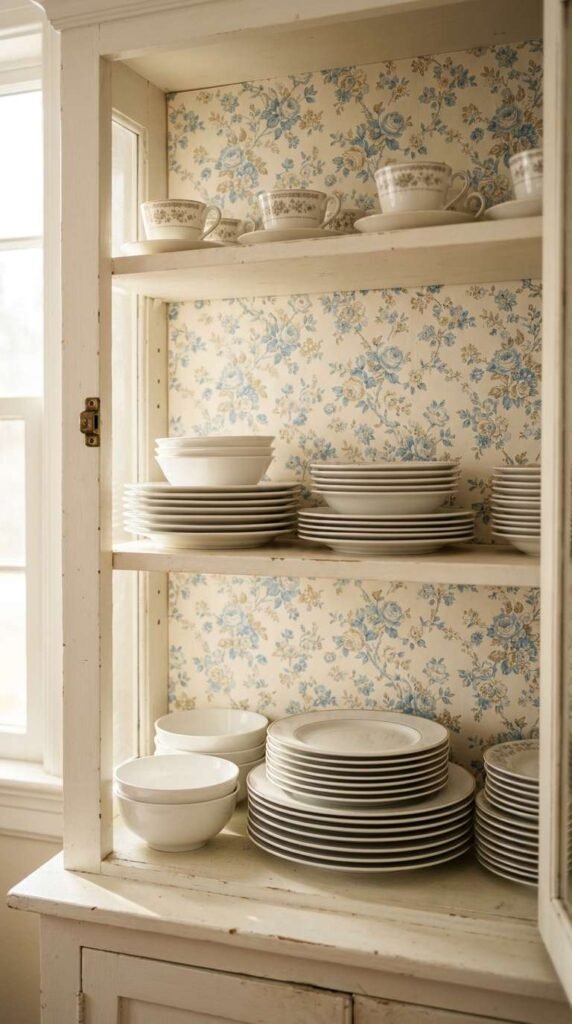
- Peel and stick wallpaper cut to the exact size of each back panel behind the glass-front doors, with 0.25 inch extra on each edge to trim.
- A small scale floral print for a compact cabinet, and a larger print, with flowers 4 inches wide, for a wide cabinet.
- Plain white dishes in front of the paper, since white china shows up best against a patterned back.
- One 12 inch sample of the paper tested against your dishes first, since one roll covers the whole cabinet.
- Air bubbles smoothed from the center outward with a flat card as the paper goes down.
Wallpaper on the back panel behind the glass-front doors adds a surprise of pattern exactly where dishes sit in front of it. The space is small, so even a premium roll covers the area at a low cost, and the effect on plain white dishes is far bigger than the price suggests. This detail makes a cabinet feel custom, since the pattern is personal and rarely appears anywhere else in the room.
Peel and stick paper keeps the project simple and removable, which suits renters and anyone unsure about a bold print. Match the print scale to the cabinet size: small patterns for a compact cabinet, larger ones for a wide piece. Smooth out bubbles as you work from the center outward, and test a sample against your dishes before you commit to a full roll.
22. Curated Small Collections
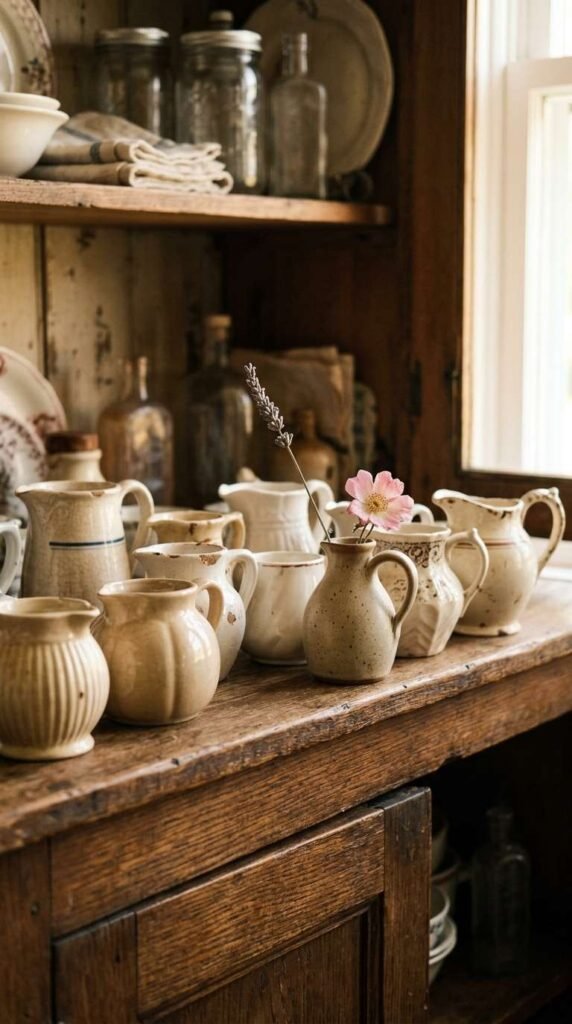
- Two or three heirlooms only for the china cabinet shelf, such as a 7 inch teacup, a silver spoon set, and a 5 inch by 7 inch photo.
- Heirlooms at eye level behind the glass doors, where the glass protects them and guests can still see them.
- One heirloom mixed with everyday white dishes on the same shelf, so the display feels like a home, not a museum.
- A small handwritten note card, 3 inches by 5 inches, beside a piece to share where it came from.
- Fragile pieces at least 2 inches back from the shelf edge, so a bumped door never knocks them over.
Family heirlooms often end up in a closet box, admired once a year and then put away again. Behind the glass doors of a china cabinet, a grandmother’s teacup, an inherited silver set, or an old photo in a simple frame gets seen every day and adds real depth to the room. Every piece carries a story that no newly bought decor item can match, which is why this section tends to mean the most to the people who live with it.
Show just two or three heirlooms at a time, and mix them with everyday dishes so the shelf feels lived in rather than roped off. A small note card beside a meaningful piece gives guests context and often starts a conversation over dinner. Keep fragile pieces at least 2 inches back from the shelf edge, and store the rest of the collection safely in the sideboard cabinet until its turn comes.
23. Cabinet Top Vignette Styling
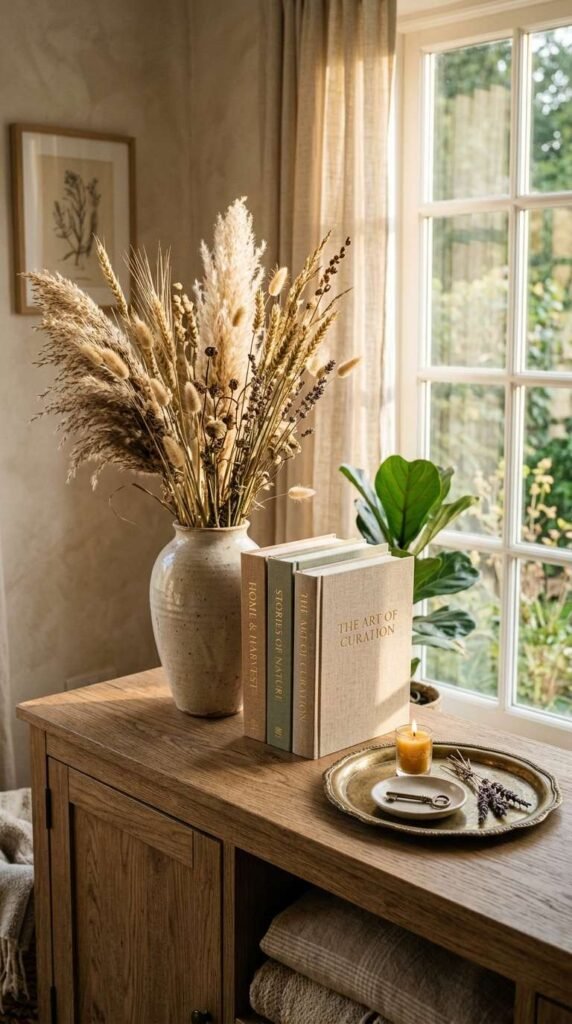
- Three objects on the flat top of a solid cabinet: a 14 inch table lamp, a stack of two books, and a 6 inch vase.
- The tallest object at one end, with the others stepping down in height to form a loose triangle shape.
- A 5 inch by 7 inch framed photo beside the books, leaning against the wall at a slight angle.
- Four inches of open space around the whole group, so the vignette reads as one arrangement, not a crowded shelf.
- A lamp with a 10 inch cream linen shade, since soft light from the cabinet top warms the whole dining room at night.
The flat top of a solid cabinet often gets left bare or covered with random clutter, yet it is the easiest surface in the room to style well. Three objects of different heights, such as a lamp, a stack of books, and a small vase, give the top its own purpose and draw the eye upward past the cabinet below. This is also the most personal spot on the whole piece, since a photo or a travel find fits here better than on a crowded shelf.
Odd numbers work best on top of a cabinet, and groupings of three read as planned rather than accidental. Keep the tallest piece to one side and let the shorter pieces step down from it, leaving open space at the edges so the arrangement can breathe. Swap one piece with the season, such as a pine sprig in winter or a fresh stem in spring, and the top stays fresh with almost no effort.
Balancing Height and Scale
Height is what makes a cabinet top vignette work. A 14 inch lamp beside a 6 inch vase gives the eye a clear path from tall to short, and a stack of two books at 4 inches high fills the middle step. Keep the gaps between heights at least 3 inches, so the pieces read as steps rather than a flat row. When the cabinet is wide, use two small groups of three instead of one large group of six, so each group has its own breathing room.
24. Mixing Ceramic, Glass, and Wood Textures for Dining Room Cabinet Decor
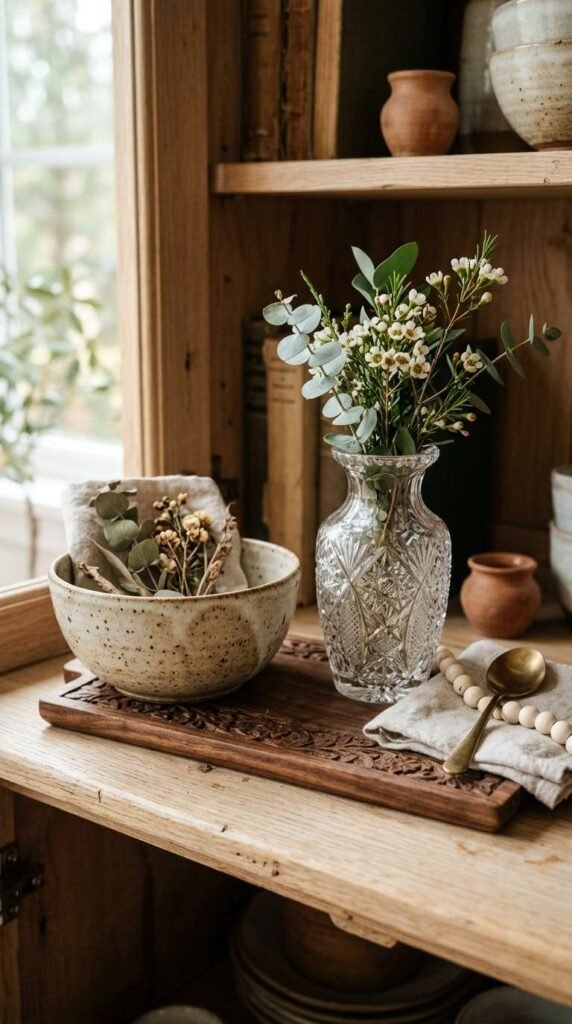
- One 12 inch ceramic serving bowl, smooth and white, on the china cabinet shelf beside a clear glass vase.
- A 10 inch wood tray in a warm oak tone under the glass and ceramic pieces, to add a third texture.
- Two materials dominating the shelf, with the third used once, such as a single wood tray among ceramic and glass.
- Matte ceramic, shiny glass, and raw wood in one grouping, so the shelf has contrast without a clash of colors.
- A folded beige linen napkin, 12 inches long, on the wood tray to soften the hard edges of the other pieces.
Mixing three materials is the surest way to make a china cabinet shelf feel layered rather than flat. A smooth ceramic bowl, a clear glass vase, and a warm wood tray each bring a different surface to the same shelf, and the contrast between matte, shiny, and raw finishes gives the eye something to move between. Let two materials dominate and use the third once, so the mix stays balanced and one material does not take over.
Color ties the three materials together. Keep the palette to white, clear glass, and one warm wood tone, and the shelf reads as calm even with three textures in play. A folded linen napkin or a small piece of woven fiber softens the hard edges of ceramic and glass. Rotate one material each season if you like, such as a darker wood tray in fall and a lighter one in spring.
FAQs
1. What items should I display in a dining room cabinet?
Everyday dinner plates, bowls, drinking glasses, and a few display pieces such as a vase, a candle, or a small plant. Keep heavy plates low, fragile china high, and linens or extra flatware hidden in the sideboard cabinet below.
2. How do I style open shelves inside a dining room cabinet?
Group pieces by color, keep stacks to three or four plates, and leave a 2 inch gap between groups. Stand plates upright at the back, set shorter glassware in front, and leave about one third of each shelf empty.
3. What colors work best for a dining room cabinet?
Sage green, deep navy, and soft cream are safe choices for a painted cabinet, while white china and clear glass suit almost any cabinet color. Pick two main colors plus one accent, and repeat them on the table linens.
4. Should dining room cabinets match the dining table?
They do not need to match exactly. A cabinet in a different wood tone or a painted color works well when it shares one detail with the table, such as the same hardware finish or a repeated color in the dishes.
5. How can I add lighting to a dining room cabinet?
Stick warm white LED strips, around 2700K, under the front edge of each shelf, or use battery puck lights with a remote dimmer. Front edge lighting washes light down over the dishes, while a small lamp on top of the cabinet adds a soft glow to the room.
6. What is a simple way to update an old dining room cabinet?
Swap the knobs and pulls for 1.5 inch brushed brass ones, which takes about twenty minutes, or paint the cabinet in sage green with a satin finish. New hardware and a mirror or wallpaper back panel are the fastest low cost updates.
7. How do I avoid a cluttered look inside my cabinet?
Group pieces by color, keep stacks to three or four plates, and leave a 2 inch gap between groups. Take one item off each shelf, since most cabinets look better with fewer pieces and more open space.
8. Can I use a dining room cabinet for storage and decor together?
Yes. Display your best plates and glassware on the top shelves, hide everyday items in baskets on the lower shelves, and keep linens and extra flatware in the solid cabinet below. One cabinet can do both jobs when each shelf has a clear role.
9. What decor styles work well for dining room cabinets?
Farmhouse, modern, coastal, and traditional styles all work. Farmhouse uses ironstone and seagrass, modern uses white and black with clean lines, coastal uses blue and white, and traditional uses crystal, silver, and rich wood tones.
10. How often should I refresh my dining room cabinet decor?
Rotate one shelf each season and give the whole cabinet a fresh look once a year. Change two or three pieces at a time, store seasonal pieces in one labeled bin, and swap the top shelf most often since it sets the look.
Conclusion
Start by naming the cabinet type you own, glass-front, solid, china, or sideboard, and let that choice guide every piece you set down. Glass-front cabinets show your best china, solid cabinets hide the extras behind good hardware and a styled top, china cabinets are built for plates and glass, and sideboard cabinets serve the table and the room at once. Pick one idea from this list, such as the brass hardware swap or the mirror backing, and try it this weekend. Save this post to your Pinterest board so you can find it again when the next cabinet needs a fresh look, and share it with a friend whose dining room cabinet is waiting for a change.